Wheelchair Accessible Half Bath

Last updated August 21, 2024

Lela is a professional organizer and home blogger who enjoys helping others tackle home organization and unique DIY projects throughout the home!
A Note From The Home Depot
If you love your home but you’re stuck with some features that don’t meet your needs, upgrade them! DIY your own remodels, like this impressive solution from Lela Burris. Follow along as she transforms a small inaccessible bathroom into a fully accessible one with help and supplies from The Home Depot.
Table of Contents
Wheelchair Accessible Half Bath
The Design Plan
Opening The Doorway
ADA Height Toilet And Sink
More Sink Accessibility Features
Marble-Look Luxury Vinyl Plank Flooring
Wheelchair Accessible Half Bath

My family and I moved into our “forever house” two years ago, and we chose it specifically because the full basement was perfect for both my home office and an entertaining space for our extended family to hang out in for holiday gatherings. It’s an extra-large divided room with a kitchenette and a bathroom, and it has its own entrance that is level to the driveway so my brother’s wheelchair can access it easily.

But there was just one problem. The tiny 5-by-6 bathroom had an even tinier doorway—23.5 inches to be exact. His wheelchair couldn’t fit through the door, and nothing inside was accessible for him, either. As a winner of The Home Depot’s 2021 Orange Tank Competition, I was able to partner with THD to gut the bathroom and turn it into a wheelchair-friendly space my brother was comfortable using.

The Design Plan
While a 5-by-6 bathroom isn’t ideal for a wheelchair user, I was determined to make the most of every square inch. Here’s my full project scope:
- Reframe Doorway to Fit 36” Door
- Replace Toilet with ADA Compliant Height
- Replace Vanity with Floating Vessel Sink
- Install Motion-Activated Touchless Faucet
- Install Tiltable Mirror
- Replace Flooring with Marble-Look Luxury Vinyl Planks
- Cover Walls with Peel-and-Stick Tile
- Replace Baseboards and Add Decorative Moulding
- Replace Acoustic Ceiling Tiles with Decorative Panels
- Install Wheelchair-Height Towel Hooks and Grab Bar
- Replace Light Fixture with LED Energy Efficient Wall Sconce
- Install a Shelf for Storage

Opening The Doorway
My top priority was opening up the doorway and installing a 36-inch door that allowed more than enough space for his chair. I rented a reciprocating saw and heavy-duty drill from The Home Depot Tool Rental, and after checking the structural integrity of the beams, I cut the new opening and reframed it with 2x4s. I chose a Prehung interior door to make the installation fast and easy. The Home Depot even delivered the door right to my garage with their Home Delivery Service, which was really helpful since I drive a small car.

ADA Height Toilet And Sink
Once the bathroom was fully gutted, my plumber installed the new toilet. When choosing a wheelchair accessible toilet, you should go with a tall height that has an oblong seat and tall tank on the back.

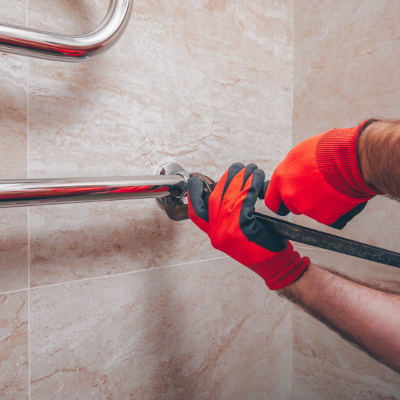
We chose a toilet with buttons on the top of the tank instead of a traditional lever. Flushing with a lever can sometimes be difficult for seniors and people with mobility issues, so a push-button flush is a lot easier. And don’t forget to install a grab bar nearby to make chair transitions safer for the user.

My plumber also installed this vessel sink directly onto the wall studs, secured with 2x4s underneath for stability. Because the sink “floats,” my brother’s chair can roll right underneath and there is lots of room for his footplates and knees. This type of sink installation allows a wheelchair user to comfortably wash their hands without having to reach and put themselves in unsafe positions.

More Sink Accessibility Features
To add to the ease of use, we opted for a motion-activated faucet that is completely touchless. It works just like the faucets at restaurants and stores do, and it really helps my brother feel independent while washing his hands.

The tiltable mirror can be adjusted to suit a wheelchair user as well as a tall person standing. It has the flexibility to cater to just about anyone, and the frameless design we chose looks clean and modern.

And the final feature at the sink is the low-hanging towel ring. This is something a lot of people don’t think about, but if you’re planning an accessible bathroom remodel, be sure to install the towel bars on an open wall at chair height. The normal placement above the sink is really difficult for a chair user to reach and use.

Marble-Look Luxury Vinyl Plank Flooring
When you’re choosing flooring for a wheelchair-accessible bathroom, you have to consider the weight of the chair rolling across it. Some tiles can’t hold up to a power chair and can crack and chip easily. The best option is a luxury vinyl plank flooring (LVP). It looks just like wood or tile, but it’s made of a strong and durable material that won’t scuff, scratch or crack. We went with a marble vinyl plank flooring and it instantly elevated the bathroom. The Home Depot mobile app came in handy with the flooring install because the Tile Calculator told me exactly how many boxes of product I would need for the job.

Peel And Stick Wall Tiles
Since this is such a small bathroom, it’s inevitable that my brother’s wheelchair will bump the walls sometimes. It’s actually so small that even I bump the walls sometimes! Between the metal footplates, a back battery pack, and big wheels, wall scuffs and scratches are a common thing for wheelchair users.

To protect the walls, I added peel-and-stick herringbone tiles. Real tiles can crack and break, but these are perfectly safe for a chair to graze against without any damage. And if a piece does get messed up in the future, I can just peel it off and replace it with another. I made sure to get a few extra sheets to hold onto in case I need them. I used the Tile Calculator on The Home Depot mobile app for these tiles also, even though they’re peel and stick. The calculations worked just the same as traditional tiles and the numbers were spot on.

Acoustic Drop Ceiling Tile Covers
The final step in our bathroom remodel was to upgrade the acoustic ceiling tiles. This type of ceiling is common in basements, but it tends to look cheap and unfinished. We ordered decorative ceiling panels designed for track installation, and cut them to fit the existing grid. They’re a very thin plastic material and we were able to cut them with regular scissors. The whole installation process took less than an hour, and I think they made the biggest difference in the room.

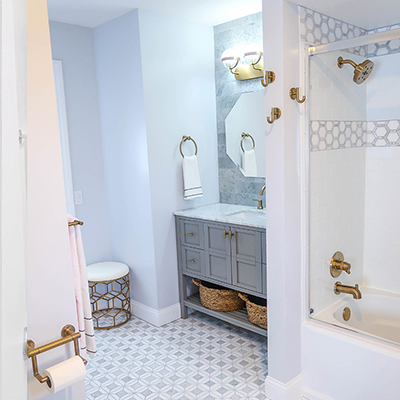
The Finished Wheelchair Accessible Bathroom Remodel
This project took us about two weeks from start to finish and required a lot of planning and measuring before we began. If you’re planning your own bathroom remodel to accommodate a wheelchair, I recommend measuring everything you possibly can so you can create a comfortable space for the user. Take into account the seat height of the wheelchair, the turn radius, the length the footplates extend and even the type of wheels the chair has. By covering every single detail, you’ll give the user a place they feel safe and independent in.
This post was created in partnership with The Home Depot. The author may have received compensation for this article and associated images or video, potentially in the form of products and/or services. All expressed opinions and experiences are the author’s own words.