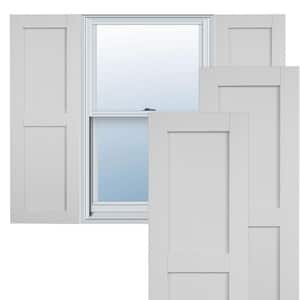
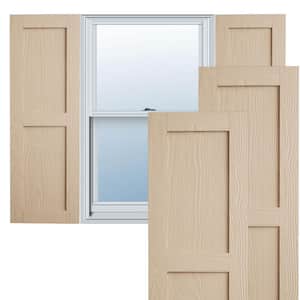
18 in. x 34 in. Timberthane Polyurethane 2-Equal Panel Flat Panel Hand Hewn Faux Wood Shutters Pair

- Shutters have a realistic wood grain, with no downsides of wood
- Ready to be painted or stained, the shutters come in many styles
- Faux shutters are ideal for all homes and are a lasting product
Free & Easy Returns In Store or Online
Return this item within 90 days of purchase.
Get an immediate answer with AI
AI-generated from the text of manufacturer documentation. To verify or get additional information, please contact The Home Depot customer service.
Product Details
About This Product
Urethane faux wood shutters stay true to authentic wood by not only having a wood grain, but also by having the ability to be either gel-stained or painted. Longevity of this faux wood material is priceless, without scarifying the real wood appearance of the shutters. Achieve beautiful curb appeal with our faux wood shutters. Compared to real wood, they are much lighter for a hassle-free installation. Not susceptible to common issues of organic wood such as rotting, termites, or warping, all the while giving an identical look to real wood. With an incredible selection of sizes and styles to choose from, you are sure to find one that suits your home's style.
Highlights
- Multiple height and widths available in popular styles
- Realistic wood appearance with authentic wood grain
- Strong and durable surface that won't easily scratch or dent
- Will not rot and impervious to insects
- Waterproof, no mold or mildew : Comes factory-primed and is ready for stain or paint
- Return Policy
- California residentssee Prop 65 WARNINGS
Product Information
Specifications
Dimensions: H 34 in, W 18 in, D 1 in
Dimensions
Product Depth (in.) | 1 in | Product Height (in.) | 34 in |
|---|---|---|---|
Product Thickness (in.) | 1 in | Product Width (in.) | 18 in |
Shutter Height (in.) | 34 | Shutter Size | Other |
Shutter Width (in.) | 18 |
Details
Color Family | Beige | Color/Finish | Hand Hewn |
|---|---|---|---|
Features | Paintable, Primed, Rust Resistant, Water Resistant | Material | Polyurethane |
Returnable | 90-Day | Shape | Rectangular |
Shutter Top Shape | Straight Top | Shutter Type | Flat Panel |
Shutter Usage | Decorative |
Warranty / Certifications
Manufacturer Warranty | Limted Lifetime Warranty |
|---|
Questions & Answers
how to attach to house?
Exterior shutters can be attached to your house in a few ways, most commonly using exterior shutter fasteners. These fasteners come in various styles, including hinges and S hooks, and can be chosen based on the look you want and whether you'd like the shutters to be operable. Here's a general guide on how to install exterior shutters using standard fasteners: 1. **Position the Shutters:** Hold the shutter against the wall where you want to install it. Use a level to ensure it's plumb and straight. Mark the location of the top and bottom of the shutter on the wall. 2. **Mark Fastener Locations:** Depending on the type of fastener you're using, mark the locations for the pilot holes on the shutter and the wall. Typically, you'll want at least two fasteners per shutter, one near the top and one near the bottom. 3. **Drill Pilot Holes:** Drill pilot holes at the marked locations on the shutters and the wall. The size of the pilot hole will depend on the type of fastener you are using. Be sure not to drill the holes too large. 4. **Attach the Shutters:** Insert the fasteners into the pilot holes and tighten them securely. If you're using hinges, attach one side of the hinge to the shutter and the other side to the wall. 5. **Repeat:** Repeat the process for the remaining shutters. It's important to consult the manufacturer's instructions for your specific shutters, as the installation process may vary. You can also find detailed guides and videos online that demonstrate how to install exterior shutters.
Can I use traditional shutter hinges and hardware with the Timberthane shutters?
Yes, you can use traditional shutter hinges and hardware with Timberthane shutters. They are designed to accommodate standard hardware, offering flexibility in your shutter installation.
Viewing 1-2 of 2
Customer Reviews
2.4 out of 5