DIY Potted Daisy Halloween Costume

Last updated August 21, 2024

Emily Jordan is a fun-loving woman from St. Augustine who knows her way around a craft table. Emily loves to spend time with her family and friends creating cool DIY costumes and photoshoots with her friends. She keeps everyone on their toes with her unique takes on creativity using everyday items.
A Note From The Home Depot
Do you love plants so much you wish you could be one? With Halloween right around the corner, many of us are scrambling to find a unique costume. Emily Jordan from emjrocket is here with a fun and unique way to stand out this Halloween season.
Table of Contents
DIY Potted Daisy Halloween Costume
Step 1: Structural Rings for Your Flowerpot
Step 2: Flowerpot Walls
Step 3: Assembling Your Flowerpot
Step 4: Cut the Excess
Step 5: Cover Seams with Masking Tape
DIY Potted Daisy Halloween Costume
Project Tools/Materials:
- 3-4 Large Cardboard Boxes
- Rust-Oleum Spray Paint in Cinnamon
- Hot Glue Gun
- Gorilla Glue Hot Glue Sticks
- Constructor Grade Masking Tape
- Manilla Rope
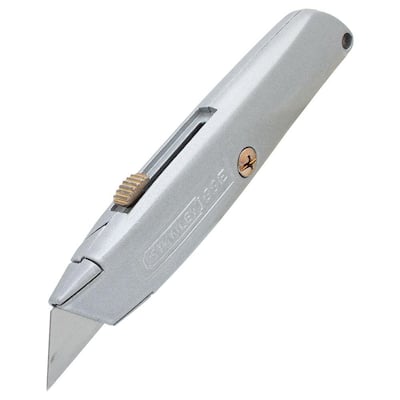
- Utility Knife
- Tape Measure
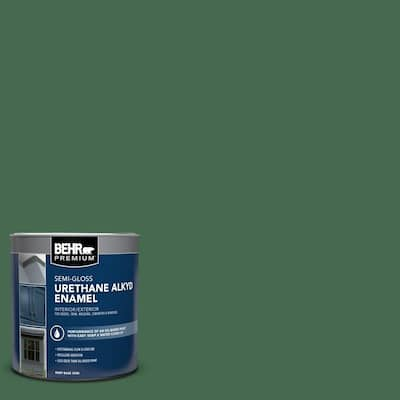
- 2 shades of green paint (Snip of Parselyand Perennial Green)
- 2 shades of pink paint (Ballerina TuTu and Sweet Chrysanthemum)
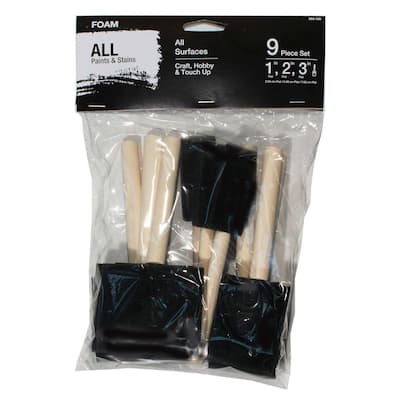
- Foam Paint Brushes
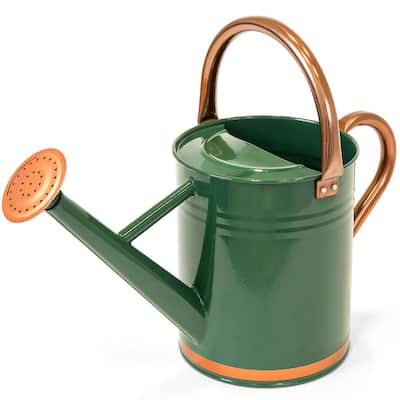
- Watering Can

The only thing I love more than being a plant mom is Halloween. This year I wanted to combine both of those loves into the ultimate DIY Halloween costume! In this tutorial, I will walk you through a step-by-step tutorial on how to create the perfect plant-enthusiast costume, a potted daisy, with materials and tools all found at The Home Depot.

Some tips before you get started:
- This will be a large costume, make sure that it’s going to fit in your car or on your usual public transit!
- When using utility knives, always make sure to have something under your cardboard so you don’t cut or scratch your table or floors.
- Save your cardboard as you go along, you’ll need every piece!
- It’s a Halloween costume made of cardboard; it doesn’t have to be perfect! The fun of DIY-style Halloween costumes is that they are homemade and created with love.
There are two main parts to this costume—the flowerpot and the daisy mask. I’ll walk you through how to create each one and then how to put it all together at the end. Let’s start with the flowerpot!
Step 1: Structural Rings for Your Flowerpot
You’ll start by making the structural part of the flowerpot. These will be cardboard rings that will go at the top and bottom of your flowerpot. For the flowerpot to have the tapered look of an actual terra cotta pot, the ring that goes at the top will be larger than the ring at the bottom. For my flowerpot, I used the following measurements. You can adjust these sizes if making for a child, just make sure your bottom ring is big enough to walk and move your legs!
- Top Ring: The outside diameter should be 26-in. The inside diameter should be 21-in. This ring should be 2 1/2-in. thick as it will serve as the top lip of your flowerpot. This ring will go outside of your flowerpot walls.
- Bottom Ring: The outside diameter should be 18-in. The inside diameter should be 16-in. This ring should be 1-in. thick and will be on the inside of your flowerpot walls.
To make each ring, measure half of each of your diameters out with twine and tie each end to a pencil to create a makeshift compass. Trace the two circles for each ring and carefully cut them out using a utility knife. When cutting out the inside circle of each ring, make sure not to cut the ring itself, it needs to be one solid piece to help your pot be as solid as possible! Keep the circles you cut out; you can use these for your daisy mask later.

Step 2: Flowerpot Walls
Next, let’s work on the walls of the flowerpot. You’ll want to take one of your unused boxes and cut one corner seam to where it lays completely flat. Pick which side will be the inside of the pot. I recommend putting the side with less visible folding seams to be the outside. Take an open pair of scissors or your utility knife and score along with the grain or corrugation of the cardboard making sure not to cut all the way through. You JUST want to score the inside layer of cardboard. This will make your cardboard super flexible and easier to maneuver into the rounded flowerpot shape.
Okay, this is where it gets a little tricky and you get to use your noodle to do some math. Don’t worry though, I made a diagram! See below for reference.

You need to make an upside-down trapezoid shape with your corrugated cardboard. The top needs to be of the circumference of the inner diameter of your top ring. That diameter is 21-in., so it needs to be at least 66-in. long. You want the bottom of the trapezoid to be of the circumference of the outer diameter of the bottom ring, so it needs to be at least 56 1/2-in. When measuring the side, make sure to center it to the top measurement! You want the height of the trapezoid to be the desired height of the flowerpot. I wanted my flowerpot to be about 20-in. tall, so I measured the height to be 21-in. to give myself some wiggle room.
Step 3: Assembling Your Flowerpot
Once you get your trapezoid measured and cut, bend it to where the two top corners meet, and the two bottom corners meet with the scored side in. Secure with masking tape inside and out. You’ll have some gaps from the cutout of the box, cover these with masking tape. You will paint over these later.
Tip: Keep any strips of your scored cardboard, you’ll need some later for the lip of your flowerpot.
Take your top ring and secure it on the outside of your shape. It should fit nicely and securely. You want to align the ring with the shortest part of the top of the shape. Take your bottom ring and secure it inside the bottom of the shape, again, aligning the ring with the shortest part of the shape (this should be around 20-in.) Use a few pieces of masking tape at the top and bottom to temporarily secure the rings. You should have something that looks like the below.

Step 4: Cut the Excess
Once you have your rings secured to your shape, take your utility knife and cut the excess. At the top, just follow the line of your top ring.
At the bottom, measure, and mark 20-in. from right under the top ring all the way around the base. Trim. Don’t worry about gaps or rough edges, we will cover those in the next step.
Step 5: Cover Seams with Masking Tape
Once the excess is trimmed, use masking tape to reinforce and hide the seams. Cut strips of masking tape and place them around the top inside rim of the flowerpot. You want half of the tape on the cardboard and the other half sticking up. Do this all the way around the rim.

Next, use a pair of scissors to cut notches about every 2-in. in the masking tape that is sticking up. Fold the notches down so that all your seams are covered. Make sure to really secure the tape!
Flip over the flowerpot and repeat on the bottom rim. Take your hot glue gun and secure the walls of your flowerpot to your rings, taking care to only glue where it won’t be seen. This would be under the ring on the top and inside the pot on the bottom.
You can use as much masking tape inside the pot as needed for extra structure.
Step 6: Add Lip of the Flowerpot
Terra cotta pots usually have a rimmed lip all the way around the top. For the lip of your flowerpot, you’ll need a long strip of your scored cardboard that matches the outside circumference of your top ring. This strip should be about 3-in. thick, and can be made up of multiple pieces if needed. Once you have that cut you can attach the rim to your top ring using hot glue.
Once the rim is attached, feel free to flip it back over and use any extra hot glue for extra security.

Step 7: Paint the Flowerpot
Once your flowerpot is entirely constructed and reinforced, you can start spray painting! Make sure to cover any parts that might be seen, inside and out.
Follow the instructions on the spray paint and apply even coats to avoid any paint drips.

Step 8: Attach the Straps
One more step and your flowerpot is complete — let’s attach the straps! While standing, determine where on your body you want your flowerpot to sit, then measure and cut your manilla rope to the correct length. Make sure to mark the inside of the pot (front and back) where the straps need to attach. Use your hot gun to attach the straps to the inside of the flowerpot. Tip: Having a friend or family member help with this step will make it a lot easier!
And just like that, you have a ready-to-wear cardboard flowerpot! Next, let’s make the flower itself.
Step 9: Start Your Daisy Mask
Remember the circle you kept from flowerpot rings? It's time to use it! The circle from the bottom ring should be about 16-in. wide, which is perfect for your mask.
This next step might feel silly, put the circle up to your head and trace around your face. You want to cut another circle out of the middle of the circle at the longest part so your entire face will fit through comfortably. My inner circle ended up being 13-in. wide. You also want to make sure your ring is thick enough for your petals so they have enough room to be attached. Mine ended up being 3-in. thick.
To create your daisy, you’ll need a lot of petals! Start by creating a template petal by free-handing your first petal on cardboard and cutting it out. Make sure that one end is flat, this is the end that will go toward your face! I made my petals about 9-in. long and about 3-in. wide. Once you're happy with your template petal, trace and cut out as many as you need to go completely around your face twice. You will then layer one set on top of the other.

Step 10: Assemble Your Daisy Mask
Use your hot glue gun to attach your petals around your mask ring. Once your petals go all the way around, start the second layer making sure to put them in the gaps between the first layer.
After you have all the petals secured, start painting! I used BEHR paint in the very appropriately named Sweet Chrysanthemum, for the whole daisy and the darker color, Ballerina Tutu, for details. Make sure to paint both the front and the back of your daisy.
For the mask to stay on your head you’ll need two strips of cardboard that will go over the top and the back of your head. These will overlap and attach to the back of the mask ring. The length of the strips will be determined by the size of your head. Make sure to add an inch or two to each side to have a tab to connect to your mask.
Once you have these cut, and you make sure you can fit your head through, attach them to your mask with hot glue. You can also use an open stapler for extra hold. Once they are attached, paint them green.

Step 11: Add Leaves
Now that you have your flowerpot and daisy mask finished, it’s time to add some leaves! Start by creating a template leaf by free-handing your first leaf on cardboard and cutting it out. I went for two different leaf sizes and cut out about seven of each.
Once you have your leaves cut out, paint them front and back. I painted half of my leaves in the Snip of Parsley color and the other half in Perennial Green, both by BEHR. Using two shades of green will help your leaves stand out and not blend all together in your flowerpot. Once your leaves are dry, add some leaf veins to each leaf with the opposite shade of green.

Next, you can start hot gluing the leaves to the inside of your flowerpot. You will only want to add leaves in the front and back of your flowerpot, making sure that you leave the sides empty to give your arms plenty of room to move around. When attaching your leaves, also make sure to not hinder your straps. You may have to bend your leaves a little bit to better fit the curved shape of your plant pot.
I also took two of my leaves and added them to the back of my flower mask so they poked out from behind the petals.
Step 12: Win Your Costume Contest
And with that, you have a completed your potted daisy Halloween costume! Grab your watering can and head to your costume party. Thanks to The Home Depot for this opportunity and my photographer Ali Harmon (@alicancapture) for capturing this fun moment!
Tip: The Home Depot Garden Center makes for a great place to get some awesome pictures of your costume!

This post was created in partnership with The Home Depot. The author may have received compensation for this article and associated images or video, potentially in the form of products and/or services. All expressed opinions and experiences are the author’s own words.