How to Build a Pooja Mandir
Last updated August 23, 2024

Divya is the coffee-loving, multi-passionate, perpetual learner, and writer behind the scenes of Smile and a Coffee. She is a mom of 2 and a senior manager at her day job. As a lover of all things organization, decor, and DIY, she documents her journey of organizing and decorating her home on Smile and a Coffee while inspiring her readers with great tips and tricks to create a beautiful home and wonderful life. Divya is the coffee-loving, multi-passionate, perpetual learner, and writer behind the scenes of Smile and a Coffee. She is a mom of 2 and a senior manager at her day job. As a lover of all things organization, decor, and DIY, she documents her journey of organizing and decorating her home on Smile and a Coffee while inspiring her readers with great tips and tricks to create a beautiful home and wonderful life.
A Note From The Home Depot
Go spiritual by embarking on this DIY journey. Follow the steps to build your own Pooja Mandir as you watch Smile and Coffee’s Divya Prabhakar create hers! Get inspired, then head to The Home Depot, get all you need to build your own, and connect with zen.
Table of Contents
How to Build a Pooja Mandir: Step-by-Step Building Instructions
Design and Size
The Base
The Supports
The Storage
The Top
How to Build a Pooja Mandir: Step-by-Step Building Instructions
In the Hindu culture, a Pooja Mandir is very important. It is a shrine or an ornate shelf where Hindus pray. It can be found almost in every Hindu home. This is where the idols of Hindu deities are placed and prayed to.
While building a Pooja Mandir from scratch may seem like a daunting task, this blog will provide you with a step-by-step process for how to build one for yourself.
Building your own Pooja Mandir can yield multiple benefits, like saving money, a sense of achievement and satisfaction in having built it yourself, and even custom features to suit your own needs.
Without further ado, let’s get to building a beautiful Pooja Mandir.
Design and Size
The first step in building a Pooja Mandir is to decide on a design and size, which will determine the materials and steps needed.
In this post, we are building a Pooja Mandir that is approximately 4 feet wide, 5 feet high, and 1.5 feet deep. You can customize the design and size to suit your needs, but the steps provided here should give you some basic guidelines.
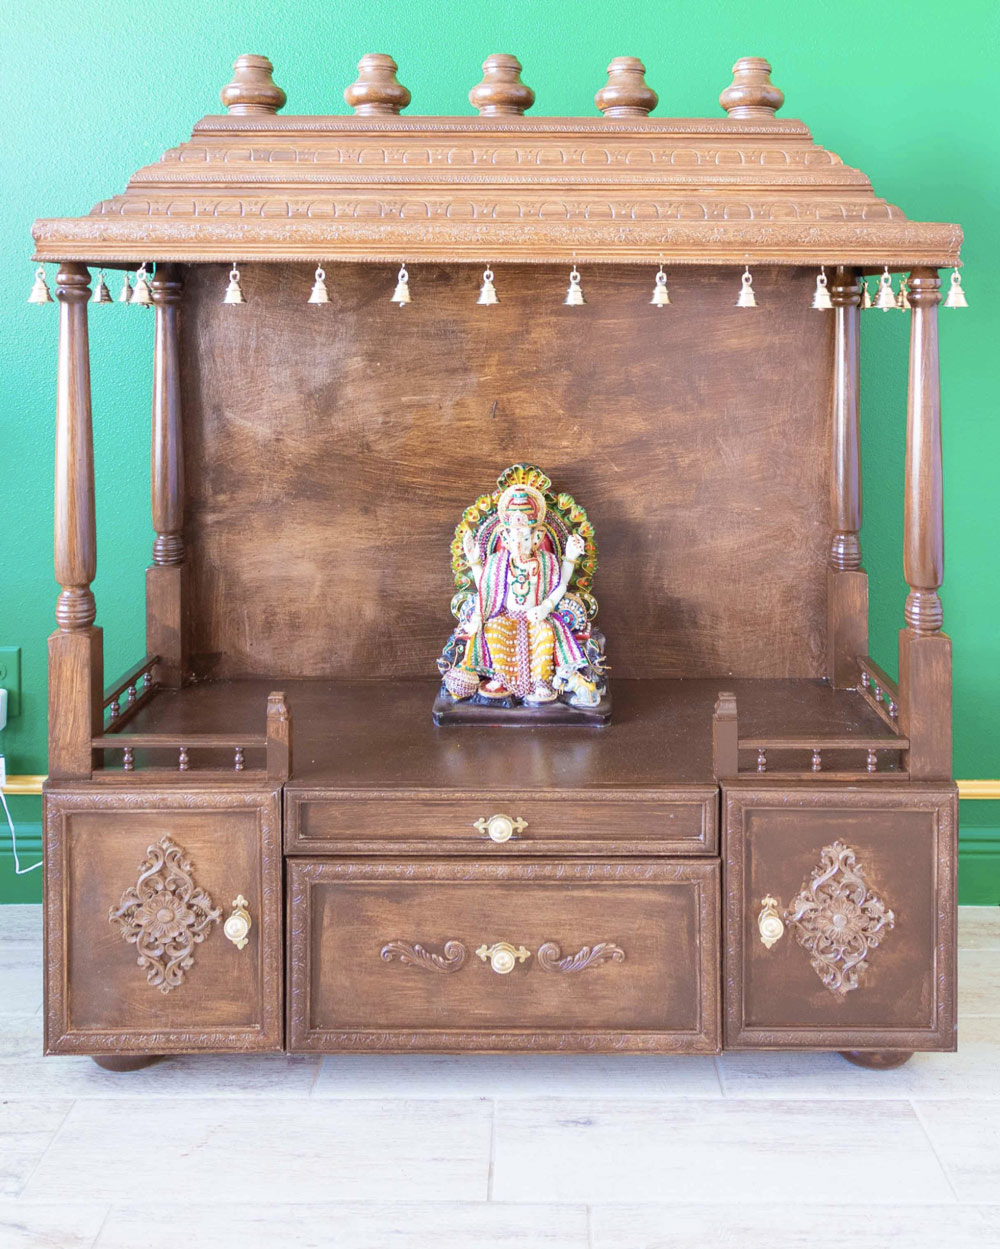
A typical Pooja Mandir consists of 4 parts:
- Base
- Supports
- Storage
- Gopuram (the top part)
The Base
Let’s start by building the base of the Pooja Mandir. We will need a sheet of ¾” plywood. We need to cut three pieces of 18” by 48” wood.
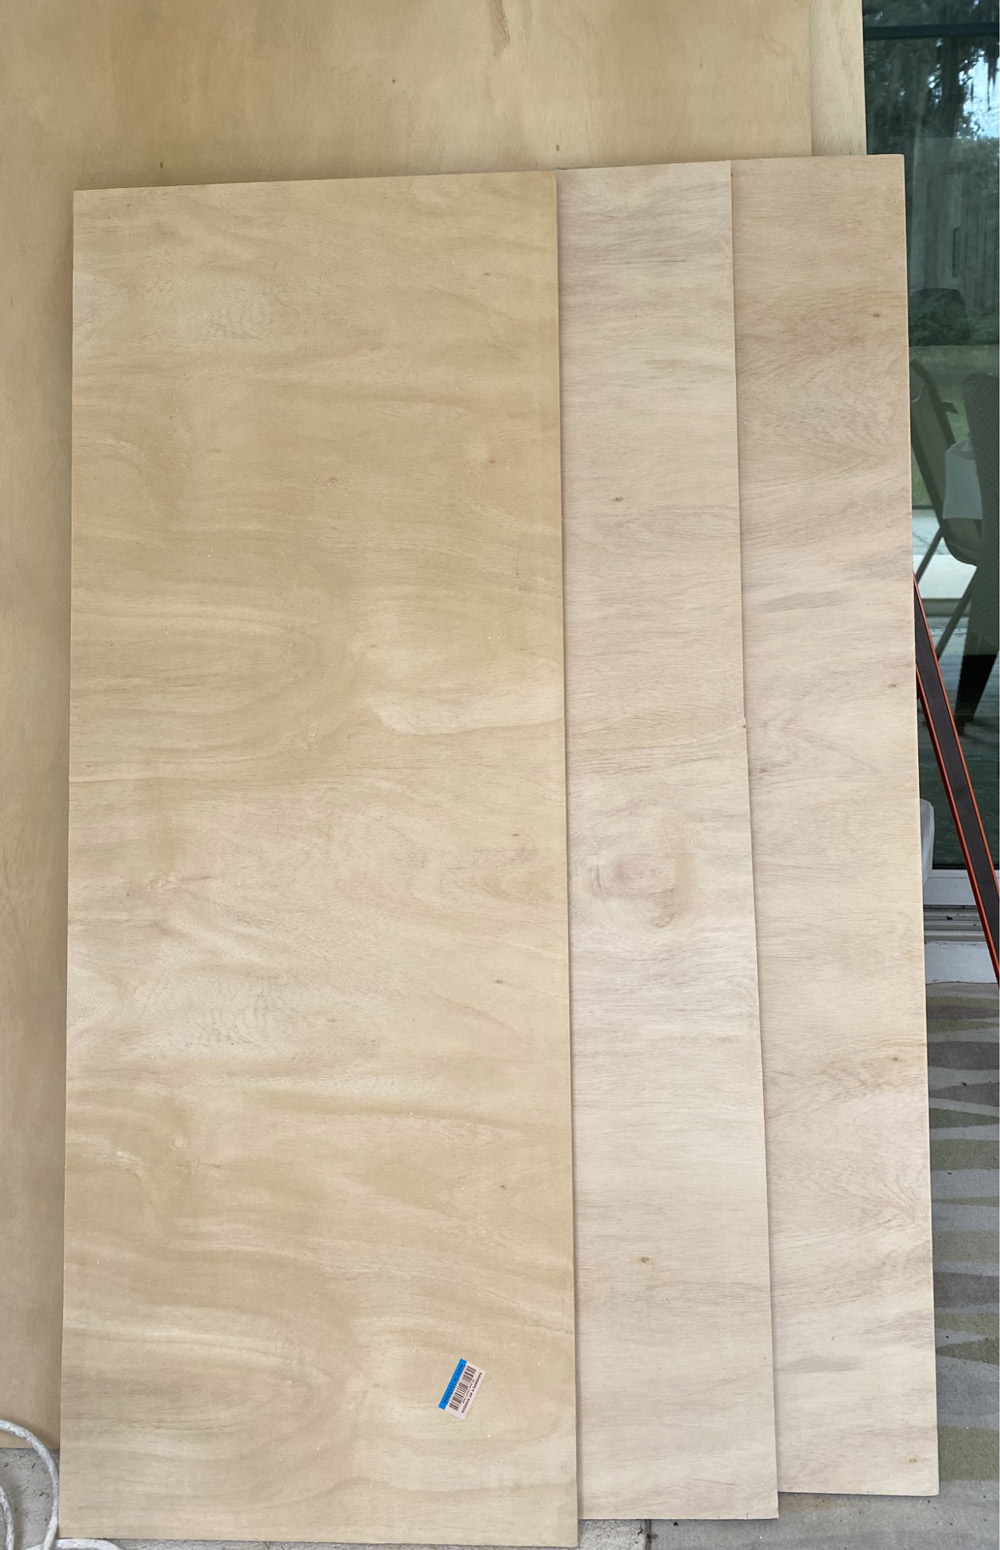
Two pieces of plywood will be used for the base, and the third one will be used as a base for the top portion or gopuram of the Pooja Mandir.
This Pooja Mandir has shelves and drawers in the base. We will need to cut out four pieces each of 18” by 12.5” for the sides of the base and the partitions to create the drawers and shelves. We can cut all the pieces needed using a circular saw and a rip-cut guide or by using a table saw.
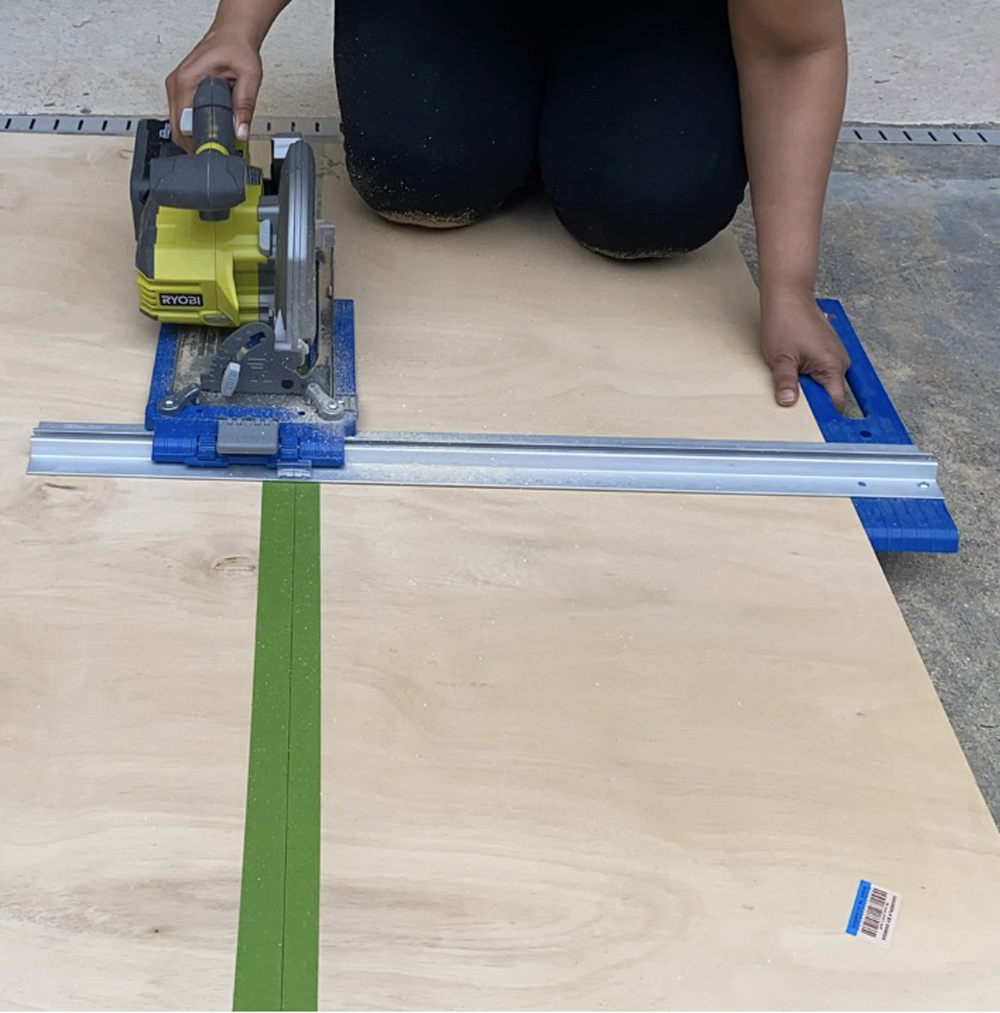
Once all the pieces are ready, the base can be built.
Next, we need to add pocket holes to the sides of the base and the partition pieces. Make sure that the pocket holes face inward.
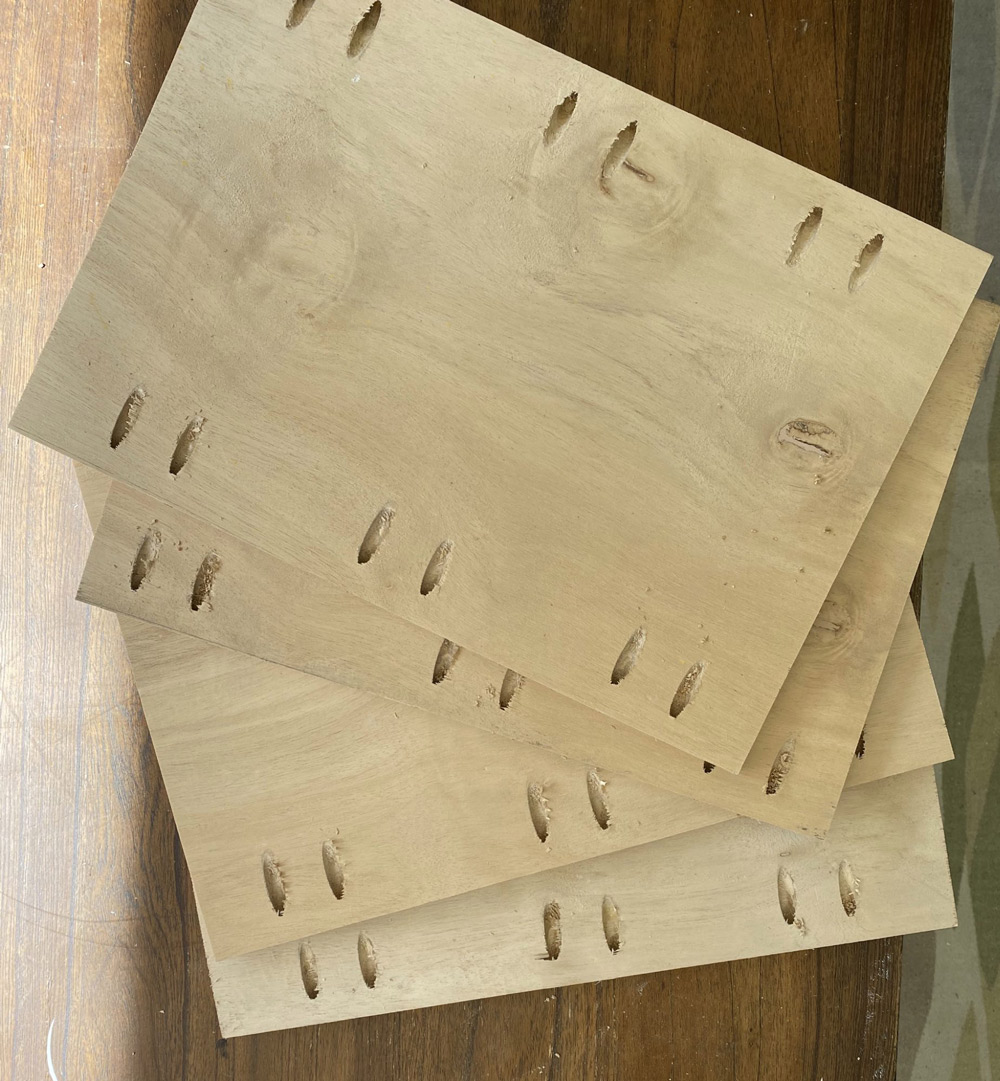
Then using wood glue, a drill and pocket screws, we need to attach all the pieces as shown in the pictures.
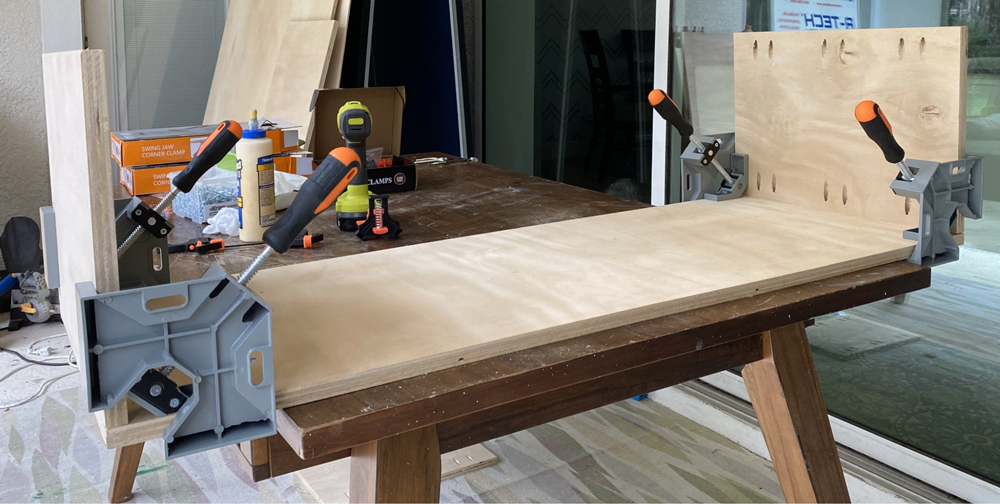
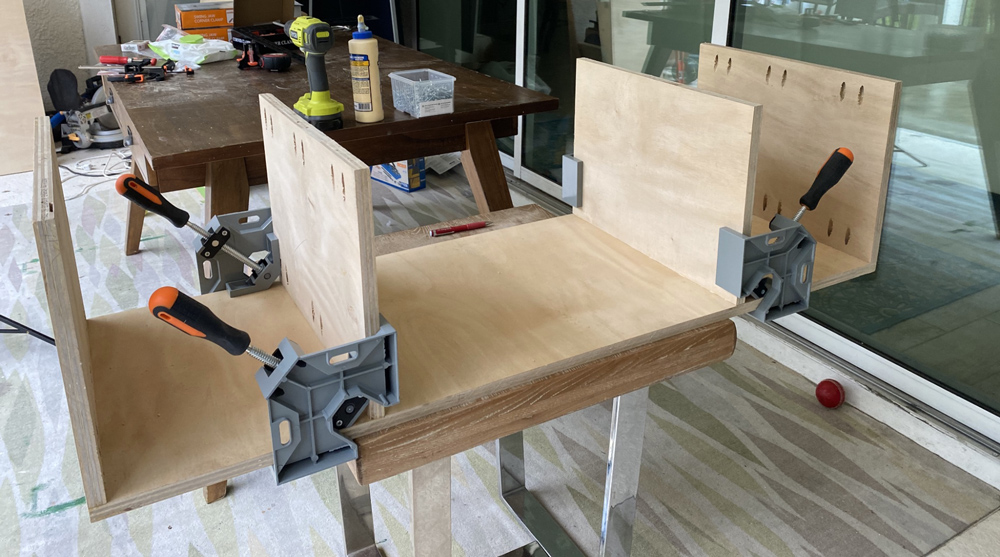
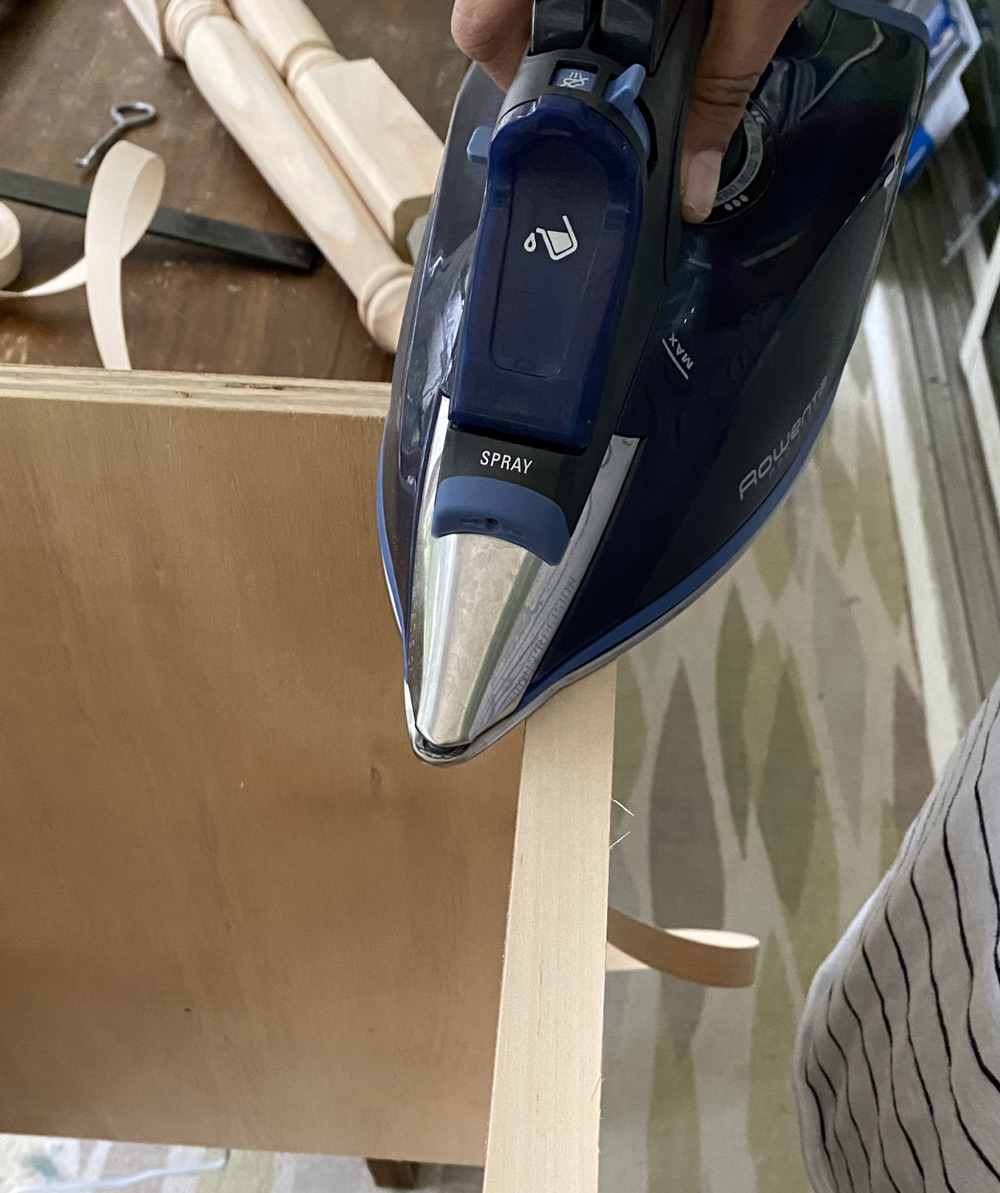
Add edge banding to the front of the base to give it a clean look. All you have to do is place the banding on the rough edge and iron it on.
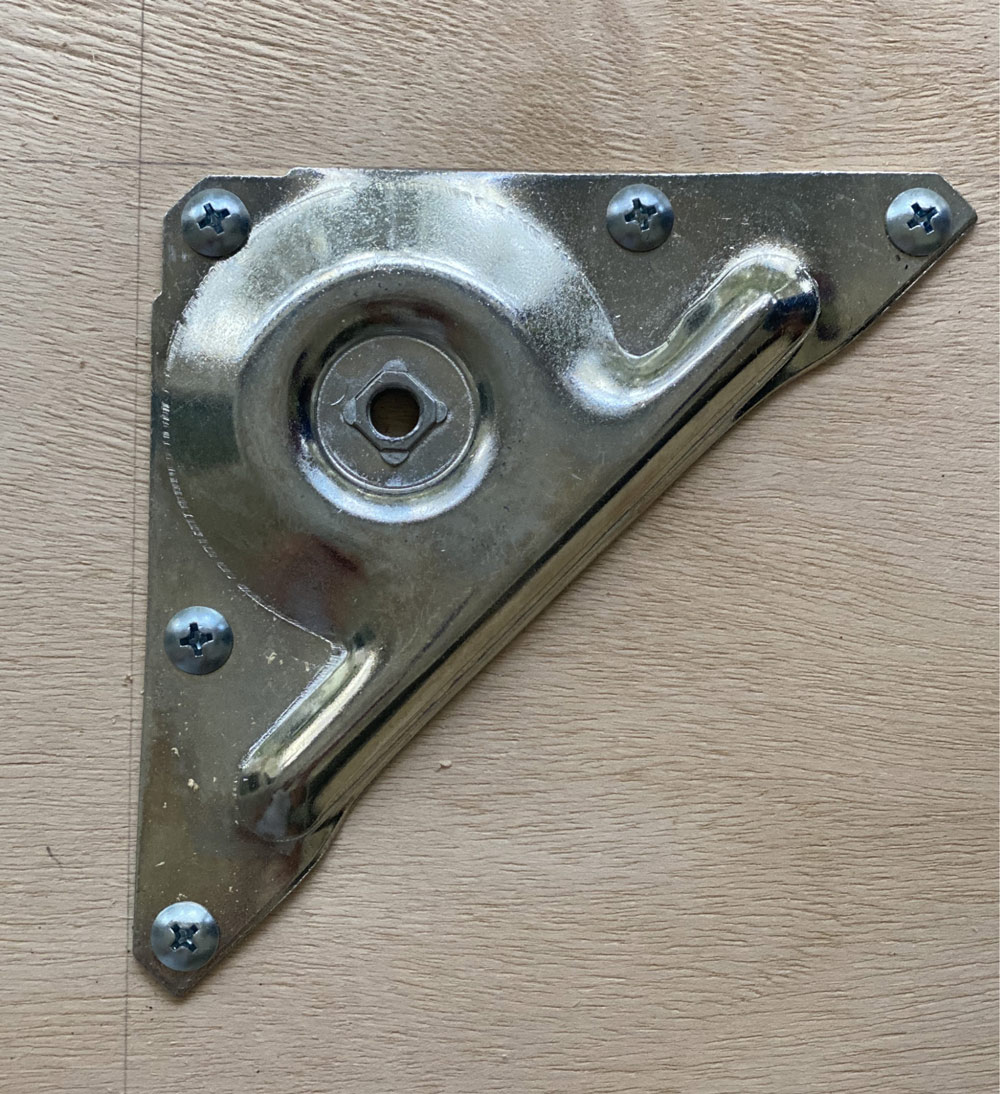
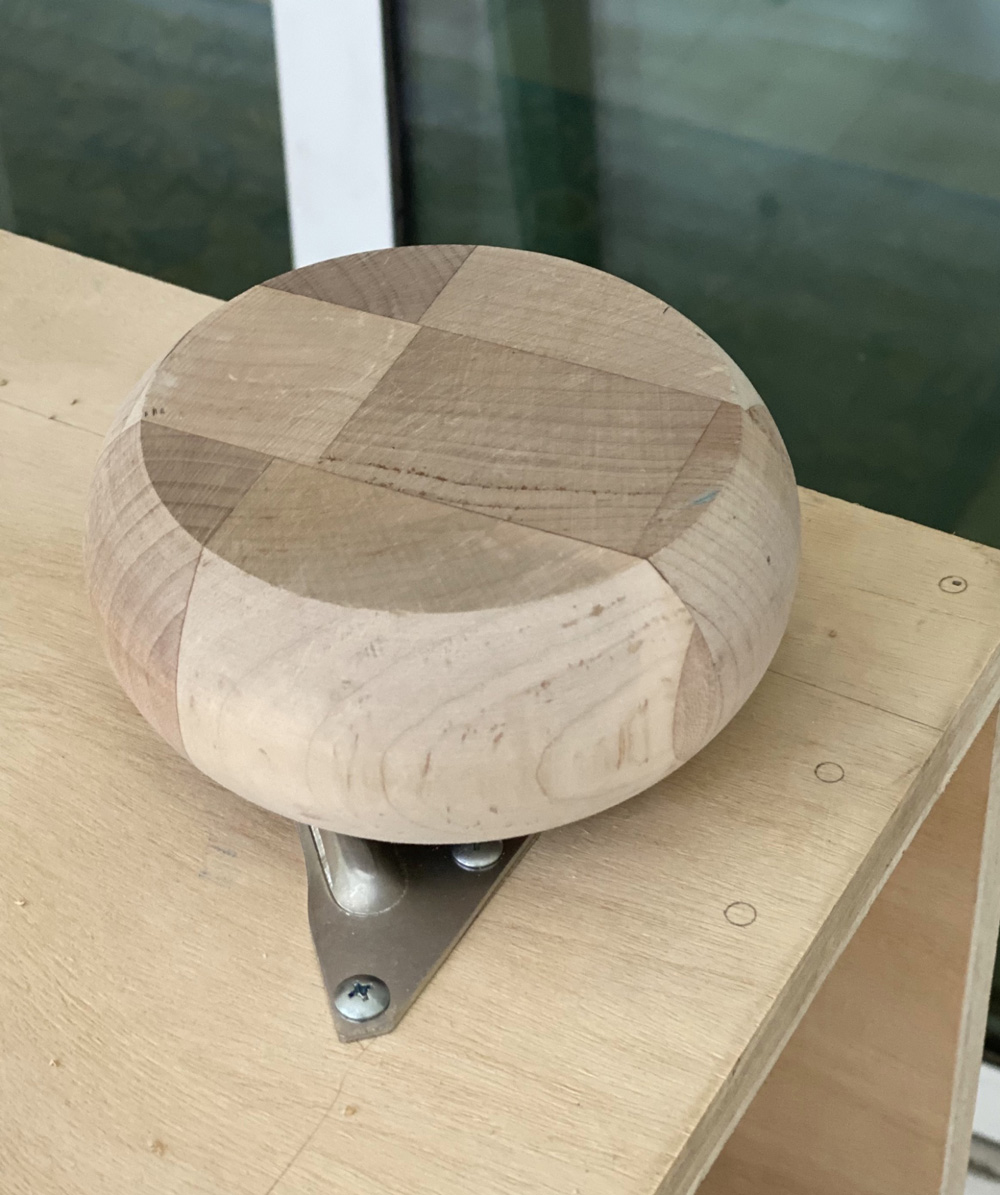
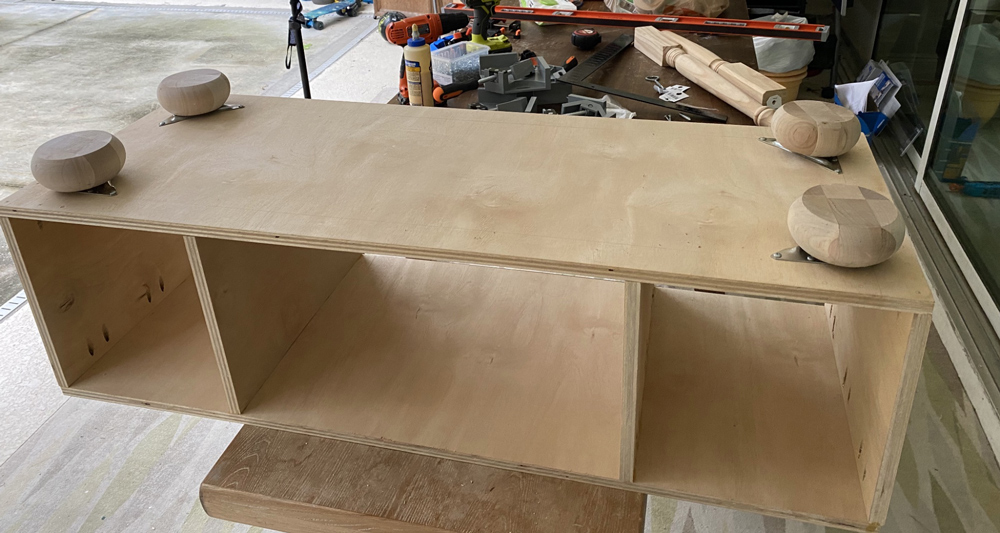
Once this base structure is ready, we can flip it over and attach bun feet or any other feet of your choice. Here are the steps to attach the feet:
- Measure and mark where the base plate needs to go.
- Drill pilot holes on the markings.
- Attach the base plates using the screws provided.
- Screw in the feet to the base plates.
The Supports
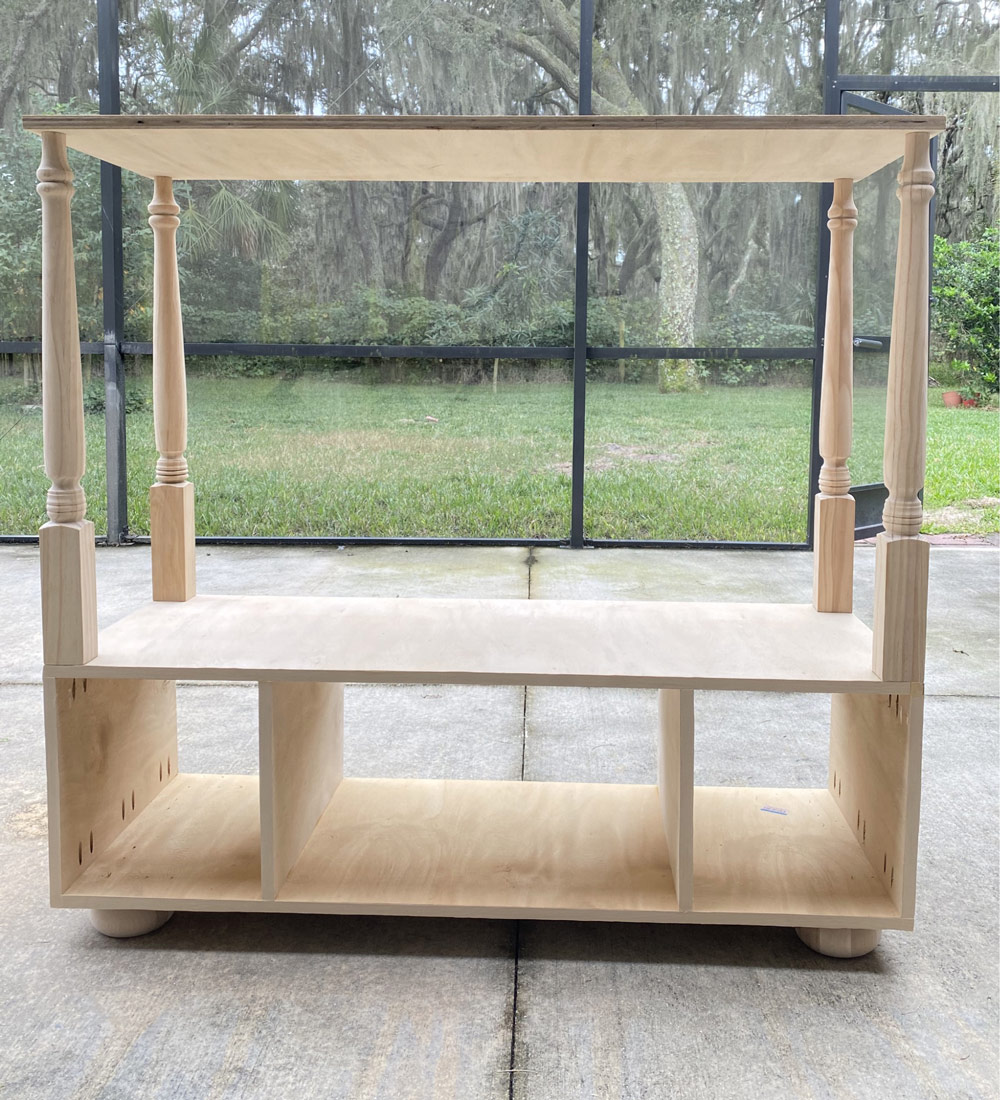
It is now time to add the supports to the Pooja Mandir. Table legs are an excellent choice for this; they come in so many heights and designs.
For this Pooja Mandir, we are using 29” table legs.
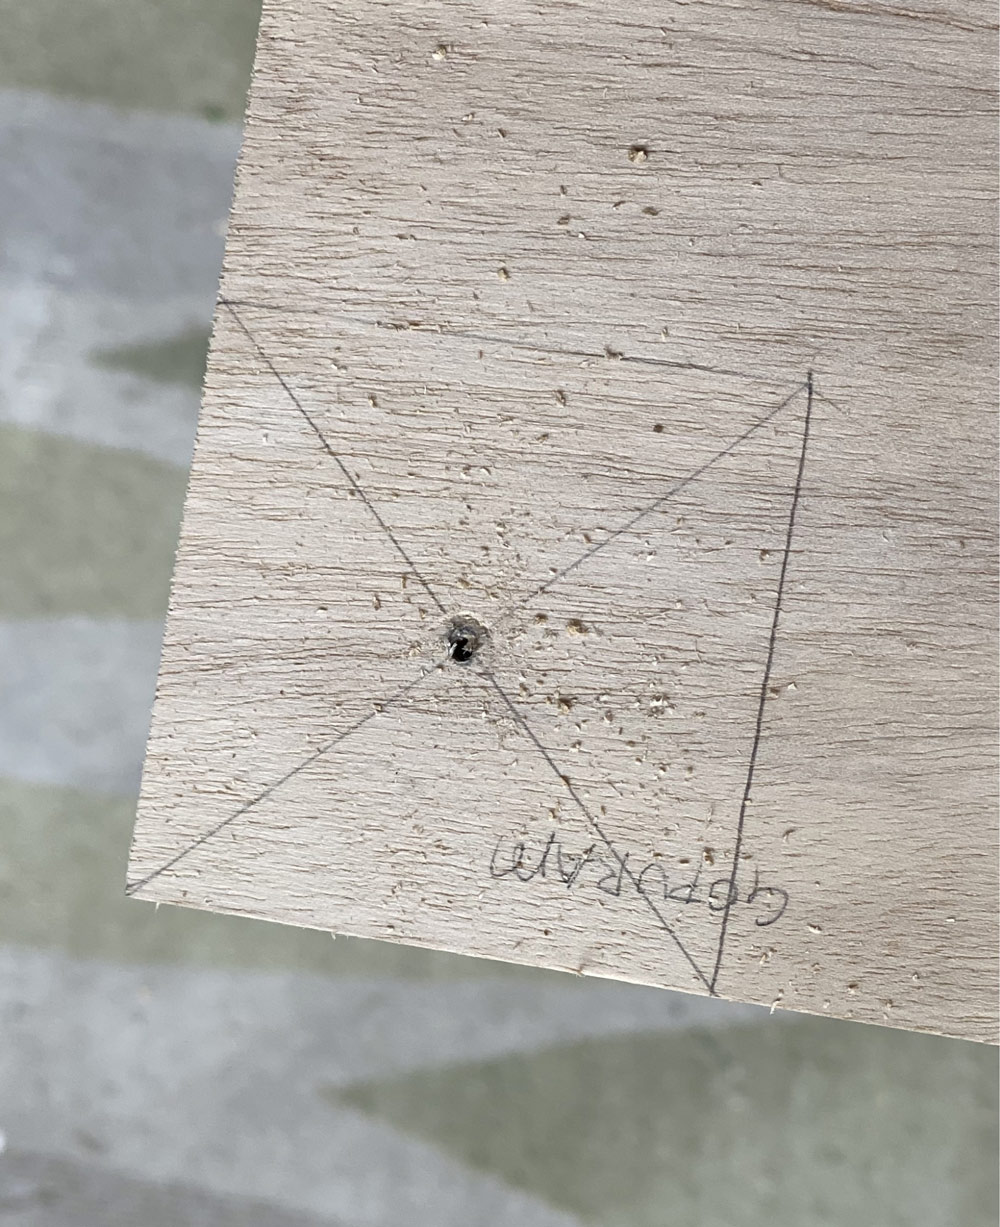
Place the legs on the four corners of the base and mark the edges of the leg. Make the same markings on the third 18” by 48” piece we had cut earlier (for the gopuram).
In addition to the edges, also mark the center by drawing a line across the corners. I will explain why we need to do this in just a bit.
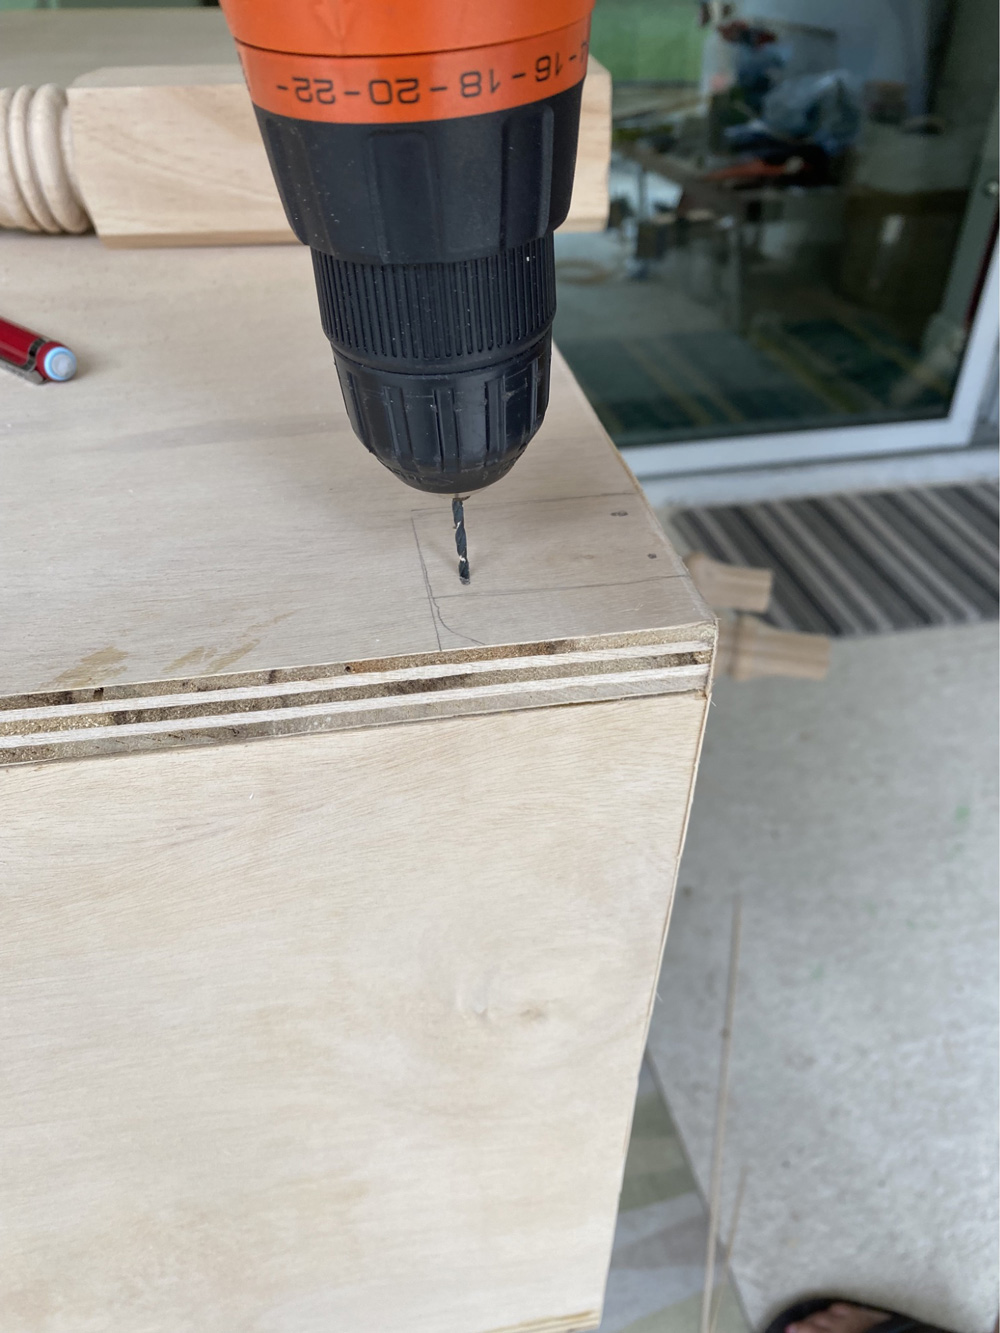
From inside the base, let’s drill a few pilot holes where we are placing the leg.
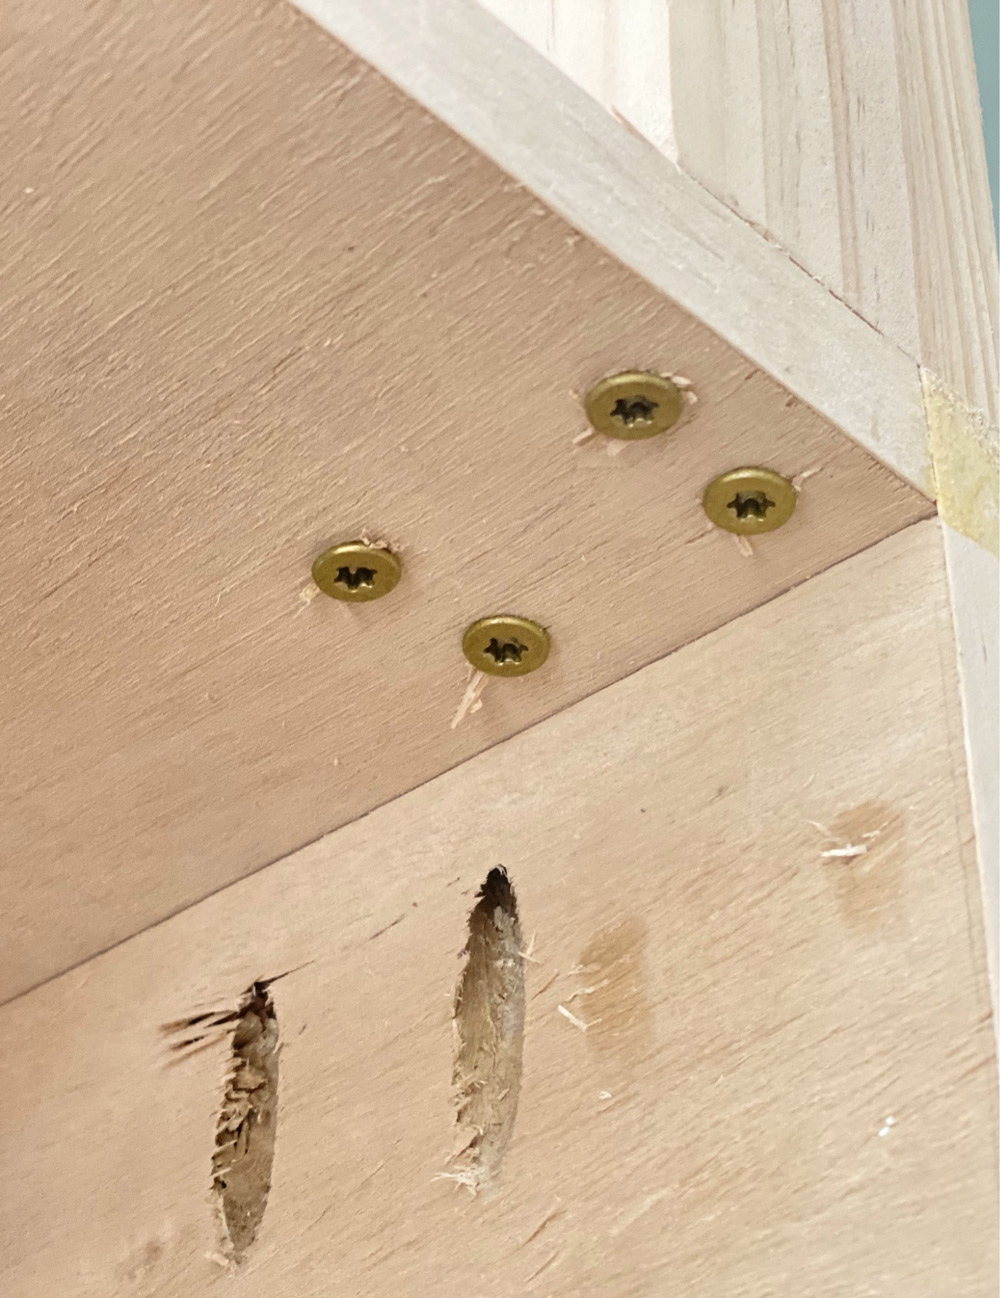
Add some wood glue to the bottom of the leg, hold it in place on the marking and add wood screws from inside the base to secure the leg. Repeat for all four legs.
Now it’s time to attach the base of the Gopuram to these legs.
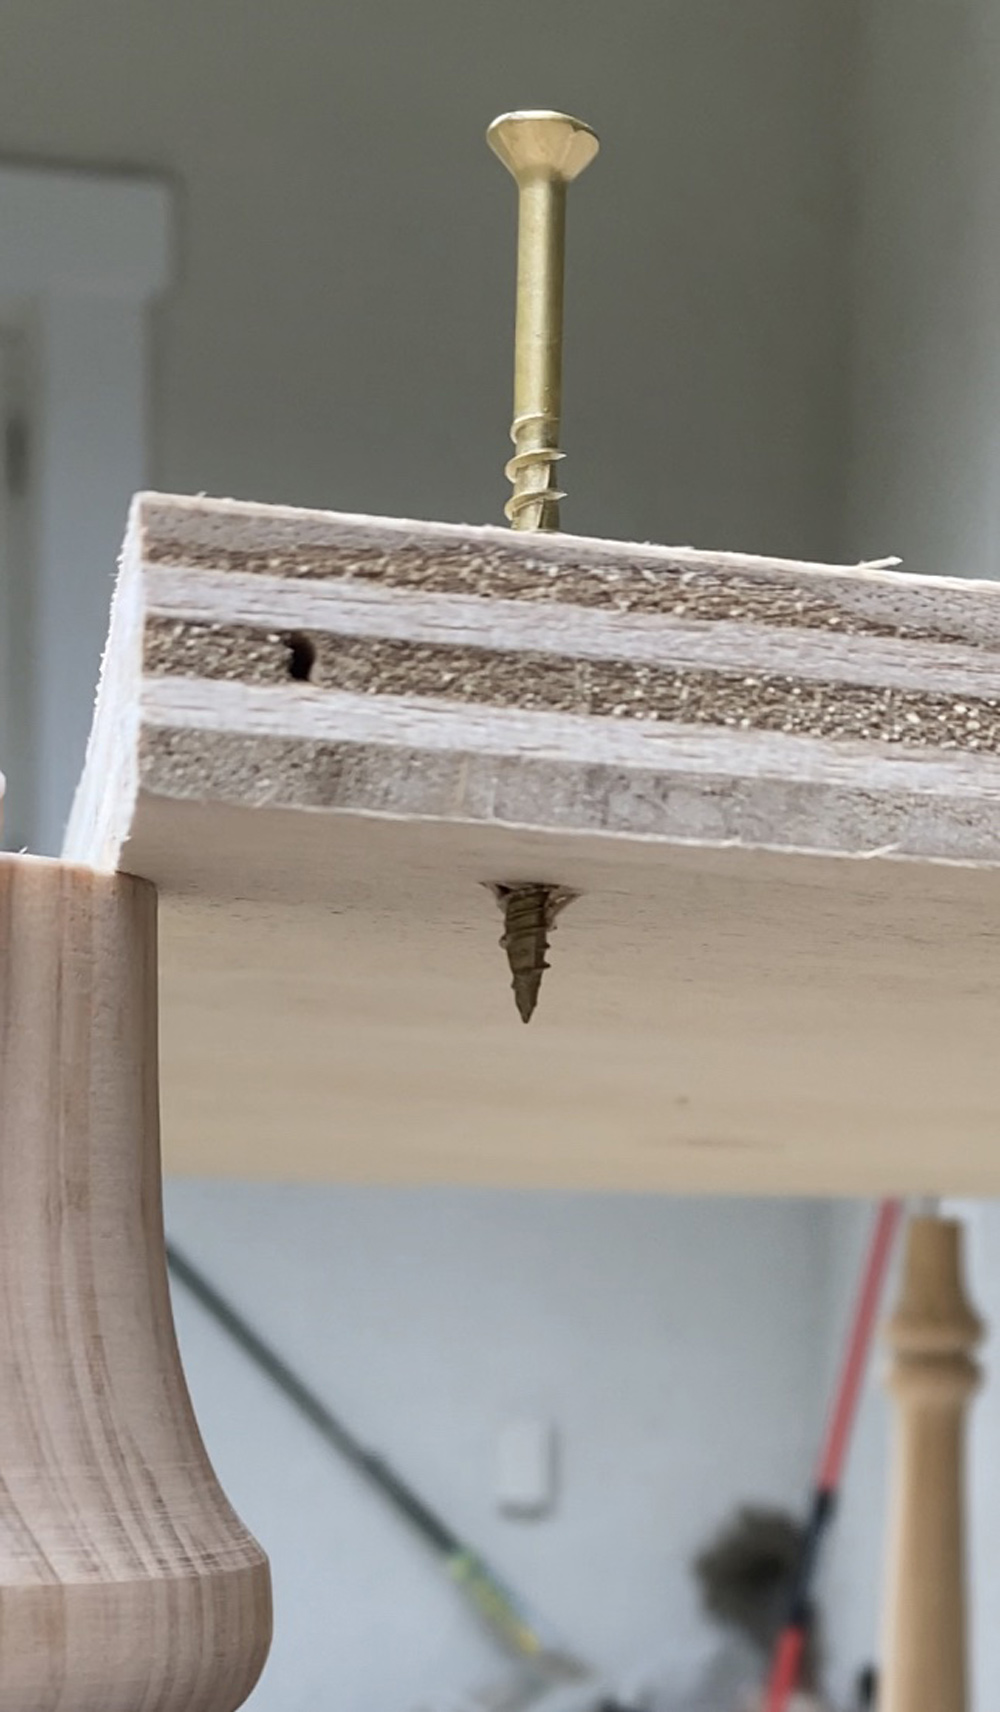
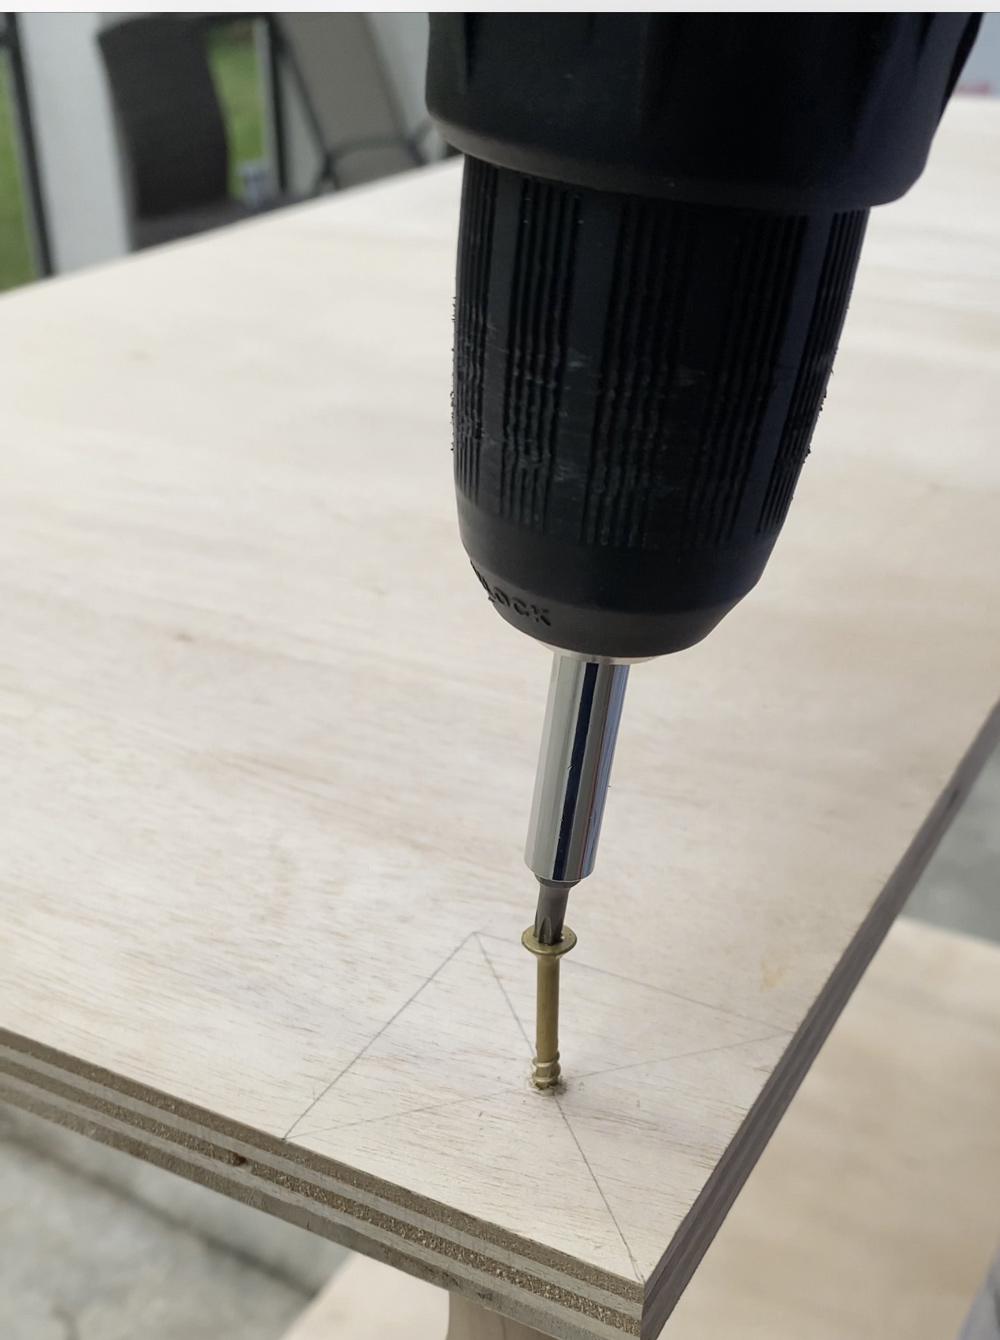
Remember that we marked the center as well on this piece? Drill pilot holes on these center markings. Add a screw from the top so that a little portion of the screw is visible below the plywood piece.
Add a little bit of wood glue to the top of the legs. Line the tip of the screw with a hole in the center on top of the leg. Drill down the screw to secure the gopuram base and the leg together. Repeat for all four legs.
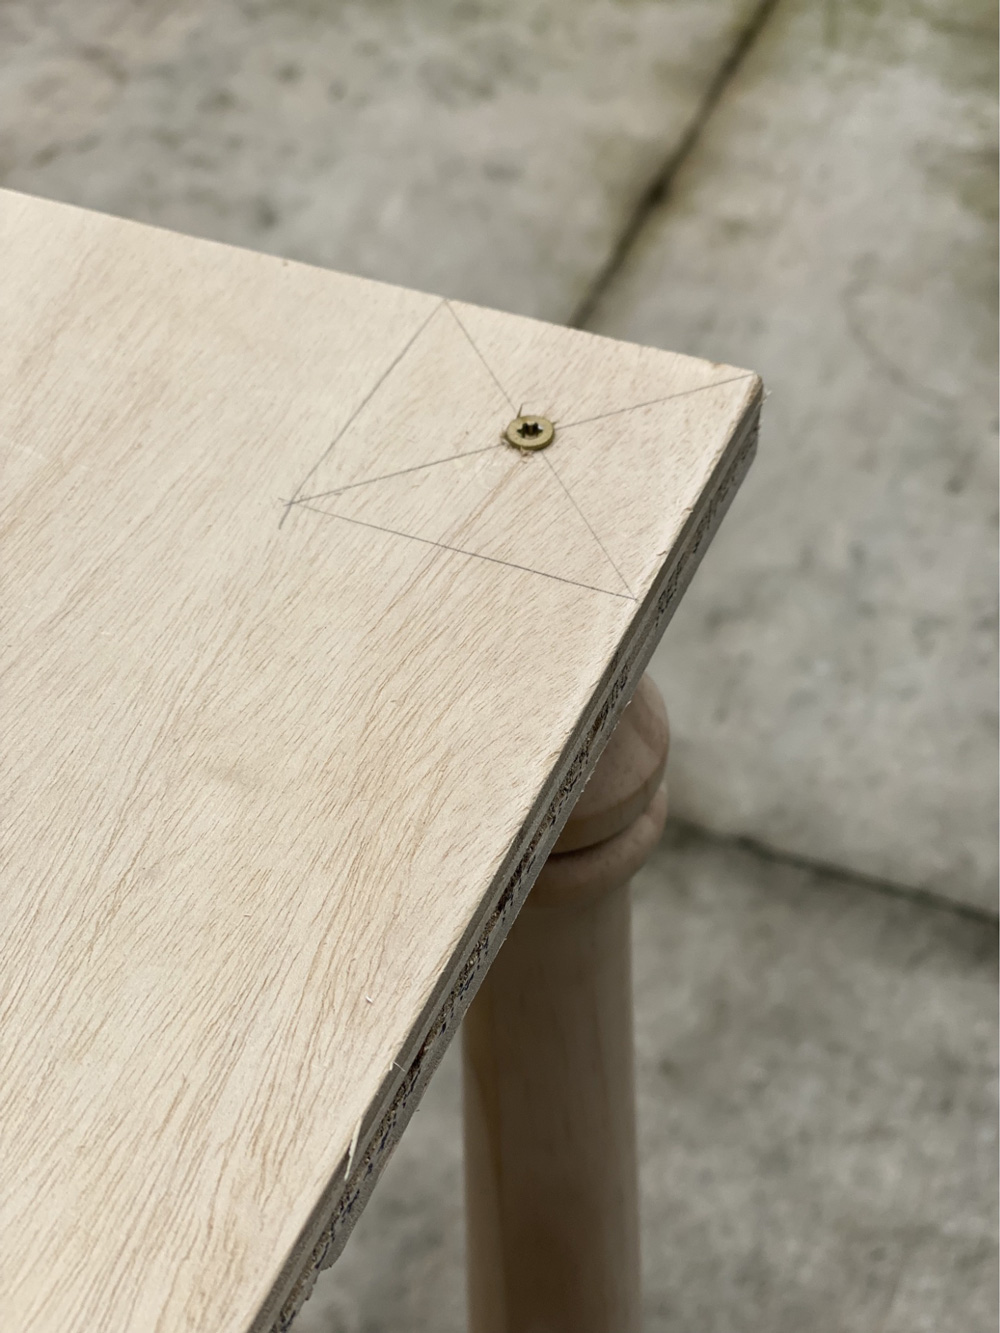
Now the middle portion of the Pooja Mandir is ready.
The Storage
The Pooja Mandir will need to be equipped with some sort of storage to house the articles needed for rituals. For this Pooja Mandir, we will add a pull-out tray and drawer in the center and two doors on either side.
First, let’s begin by adding 16” drawer slides for the pull-out tray and the bottom drawers.
The slides for the pull-out tray can be added at the top on either side using the screws provided. We will use a 2 by 4 piece as the spacer for adding the slides for the drawer to ensure that the height is equal on both sides.
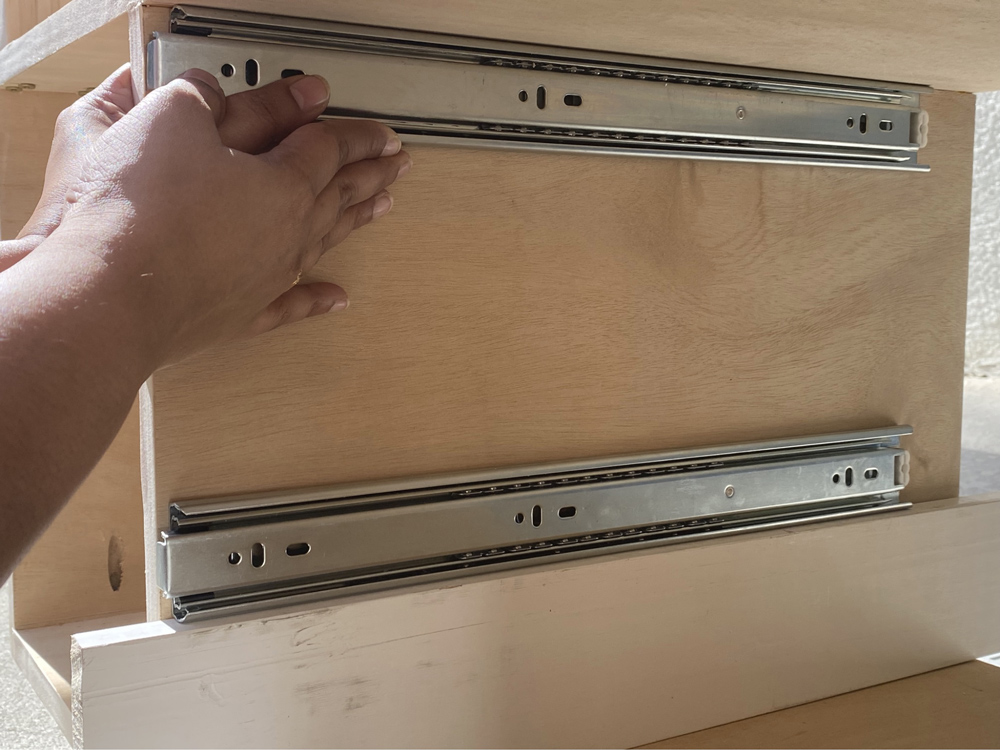
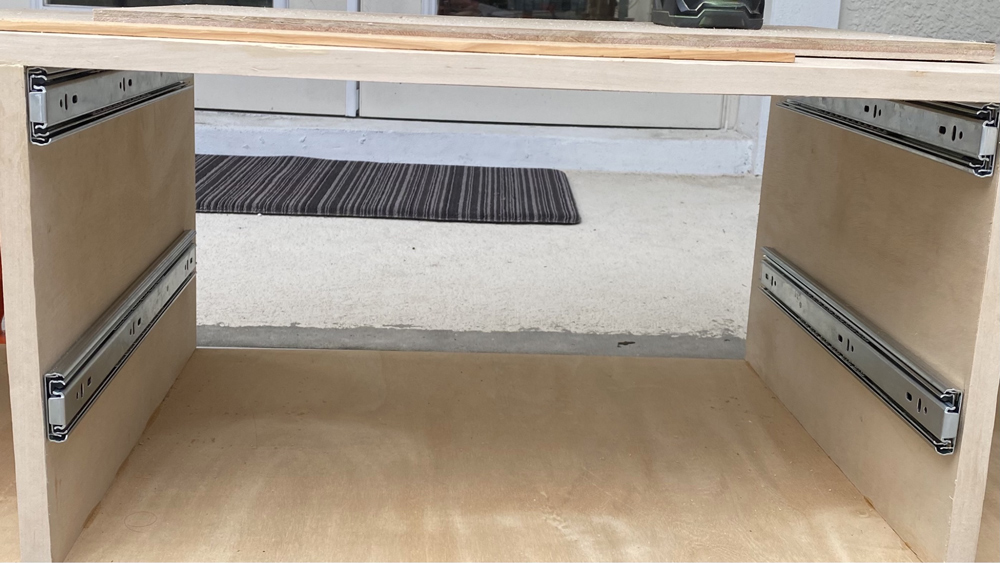
Once the slides are added, measure the distance between the slides. Using this measurement and depth of about 17”, cut the piece for the pull-out tray using 3?4” inch plywood.
Screw in the removable portion of the slide to the sides of the pull-out tray. Attach the removable portion back to the slide and make sure that the tray slides in and out easily.
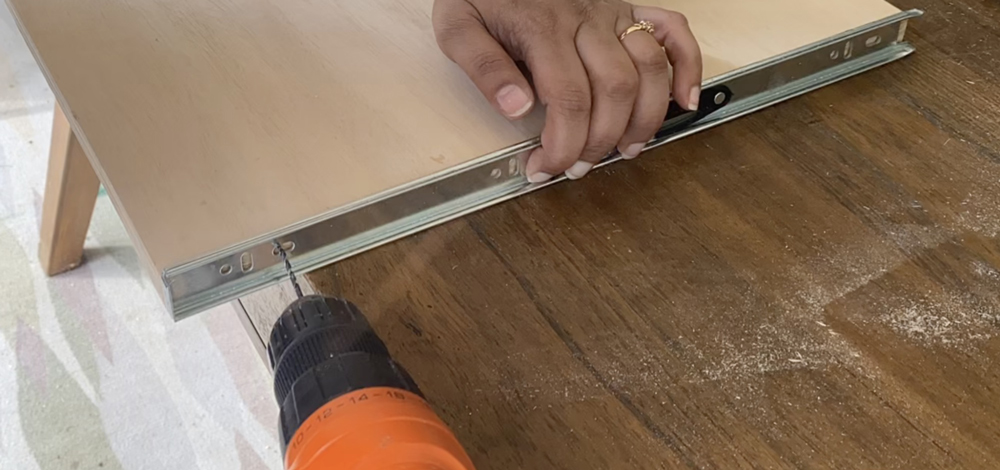
Next, using the measurement between the slides for the length, the height of 7”, and a depth of 17”, build a simple drawer box using ½” plywood for the sides and ¼” plywood for the base.
We can use pocket holes to build the drawer sides. The bottom of the drawer will be attached using wood glue and brad nails.
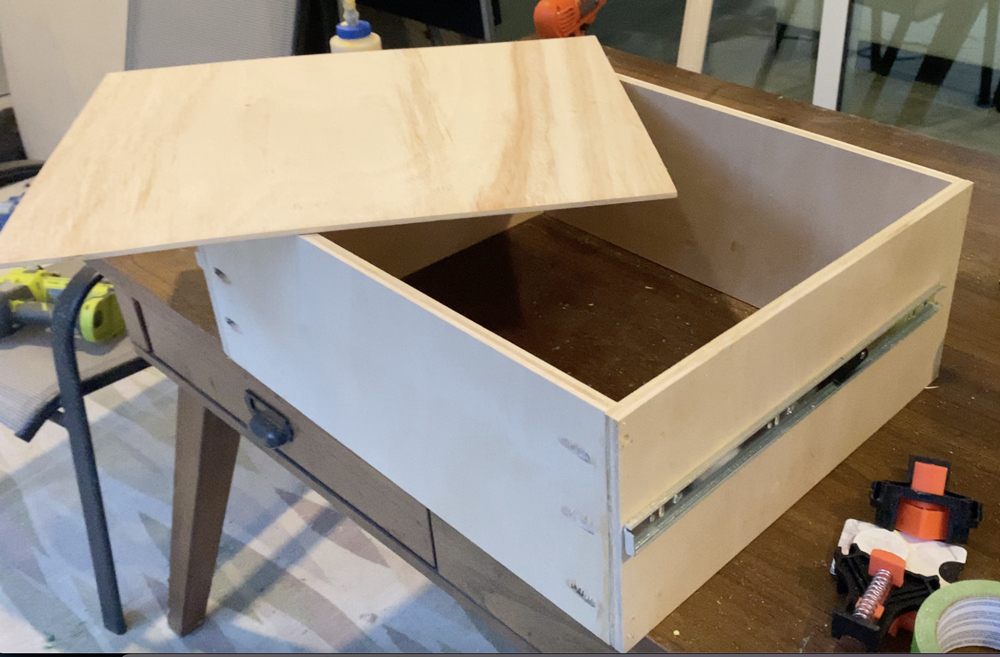
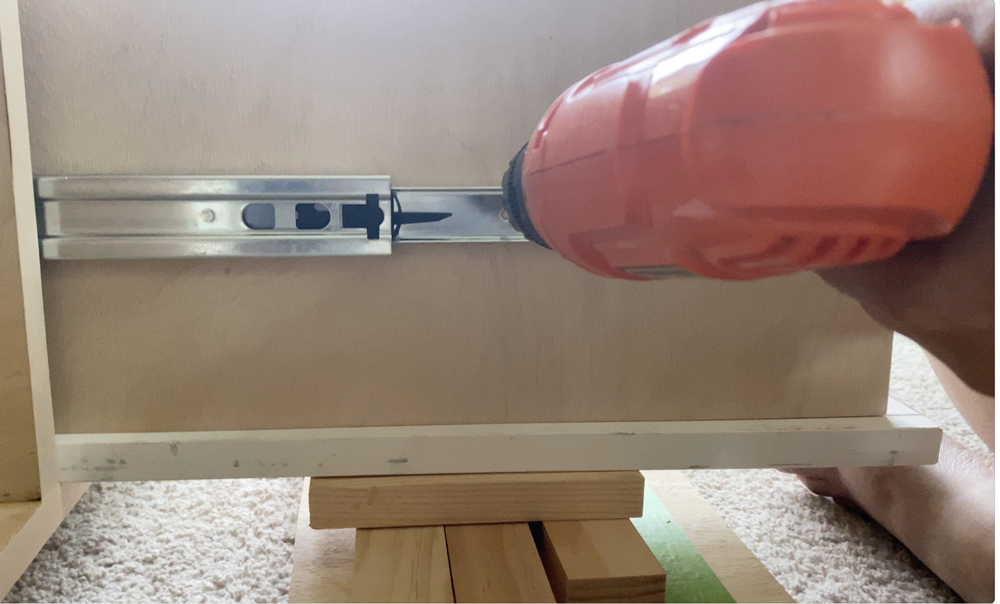
As we did for the pull-out tray, attach the drawer and ensure that it slides in and out easily.
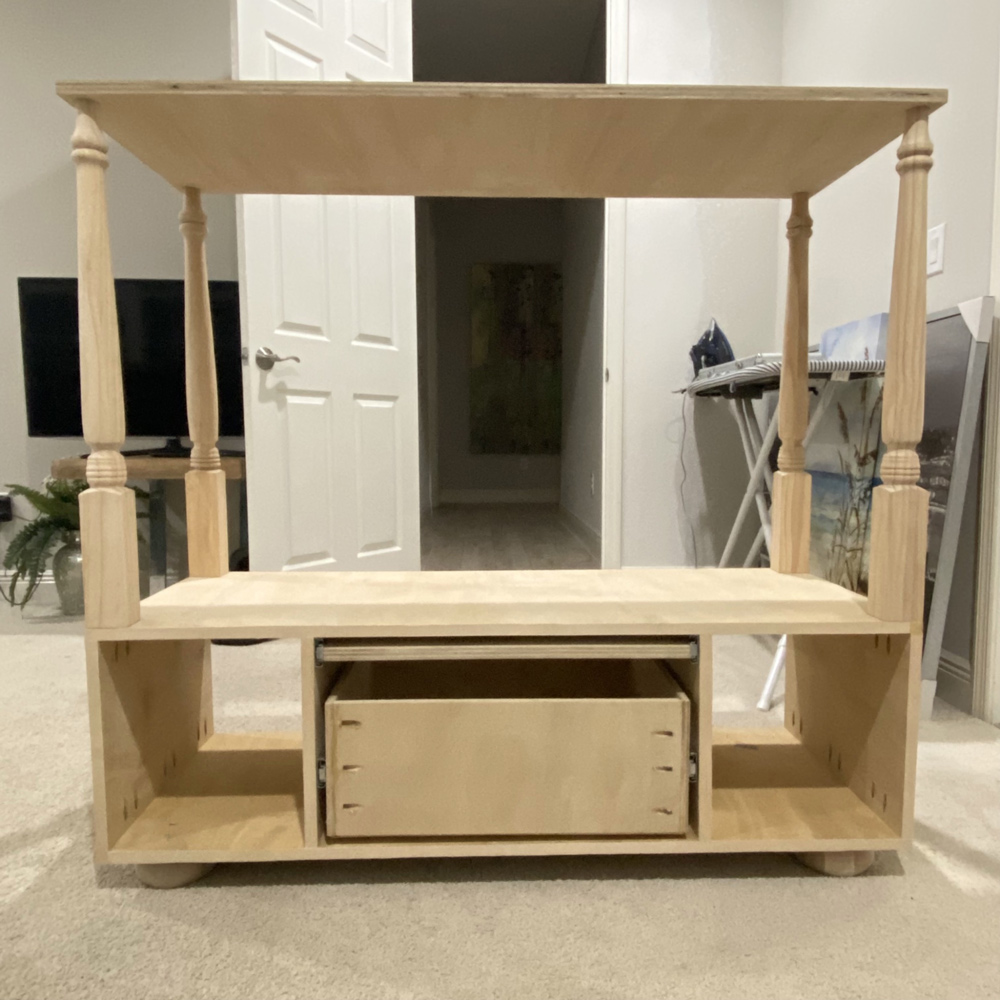
Once the drawer and pull-out tray are done, we can add doors.
Measure the opening for the doors on either side while ensuring that there is some space for the drawer front and the pull-out tray front.
Using these measurements, cut out the doors using ½” plywood. Add a decorative trim around the edges of the doors using wood glue and brad nails. Add an edge band around the doors.
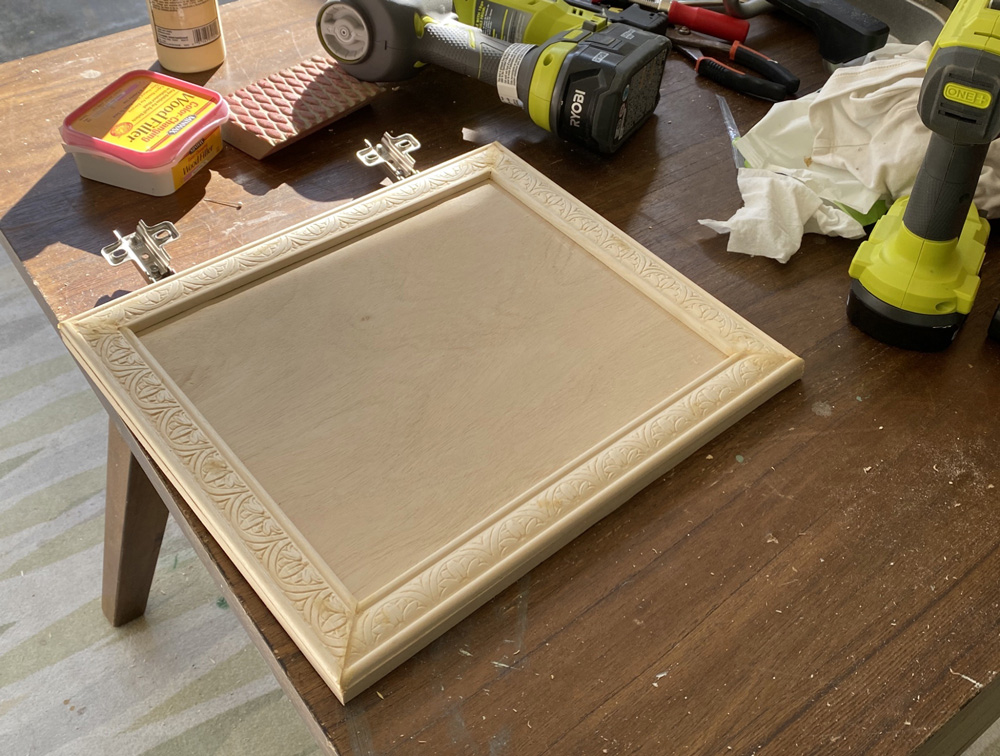
Fill the nail holes with wood filler. Then using a Kreg door jig, add the hardware for the doors and attach those doors to the base of the Pooja Mandir.
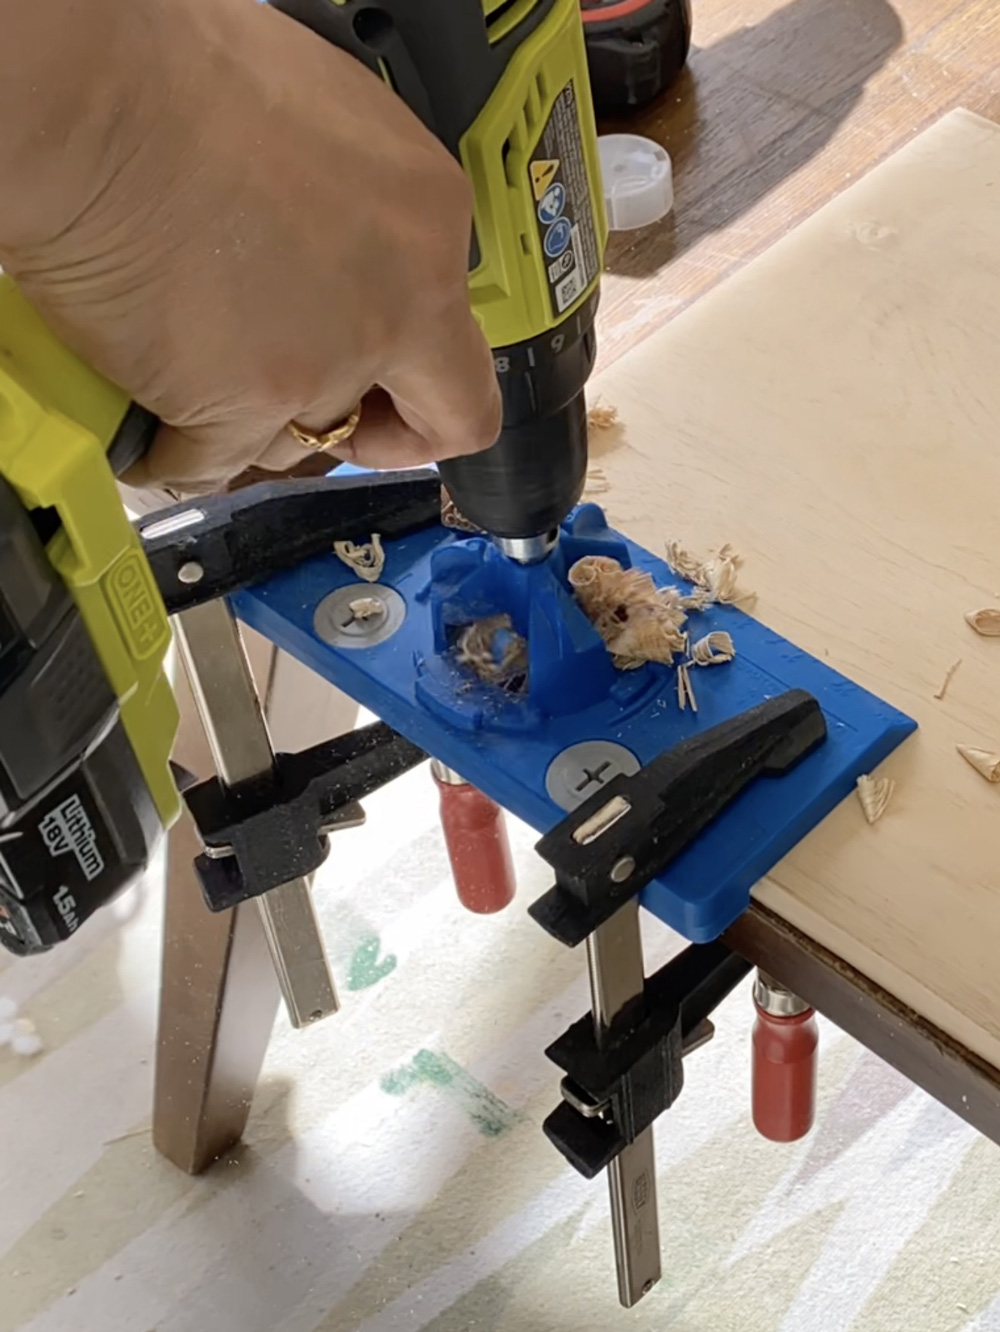
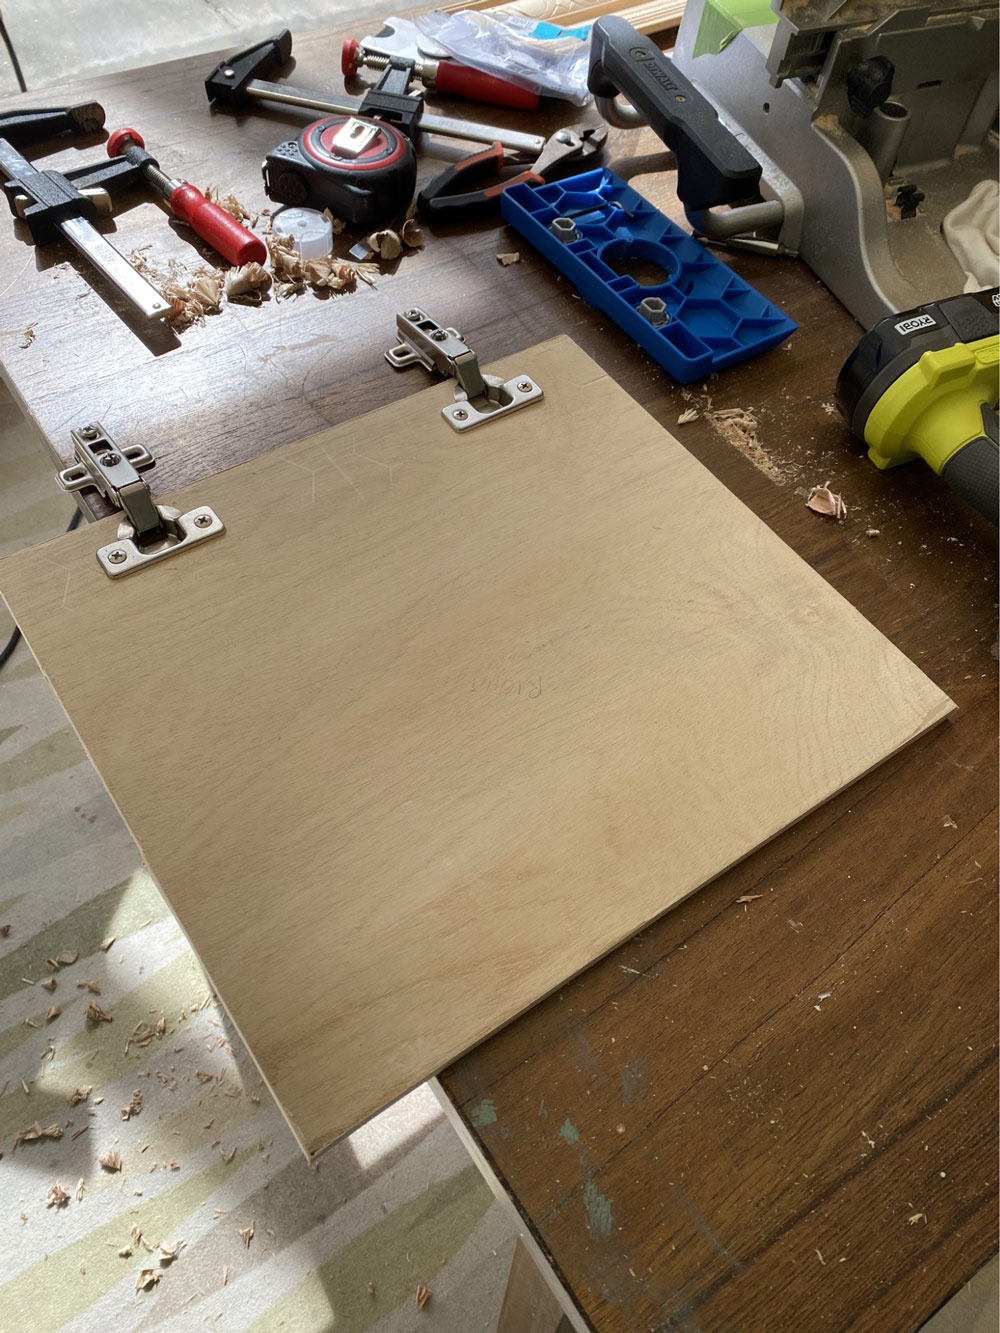
After the doors have been added, measure for the drawer front and tray front and cut the pieces from ½” plywood. Similar to the doors, add decorative trim to the fronts and edge banding around.
Place the drawer front on the drawer and add a few bard nails to hold it in place. Then open the drawer and add screws from the inside to secure the front to the drawer.
Add pocket holes to the bottom of the tray to secure the front. Similar to the drawer front, first place the front and add brad nails using a nailer. Then remove it and secure it with small pocket screws.
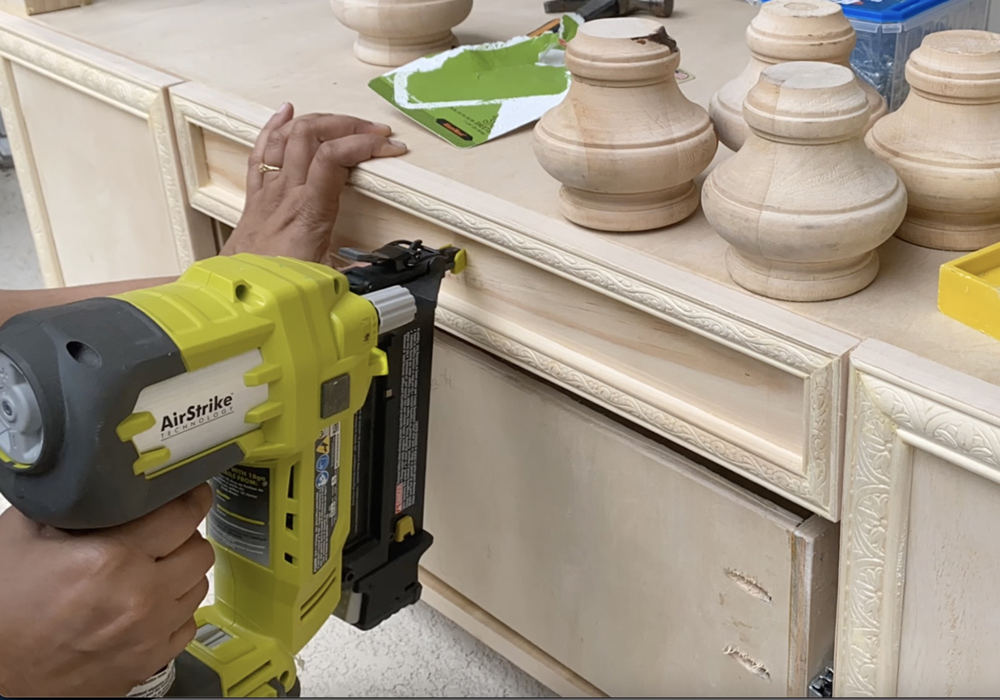
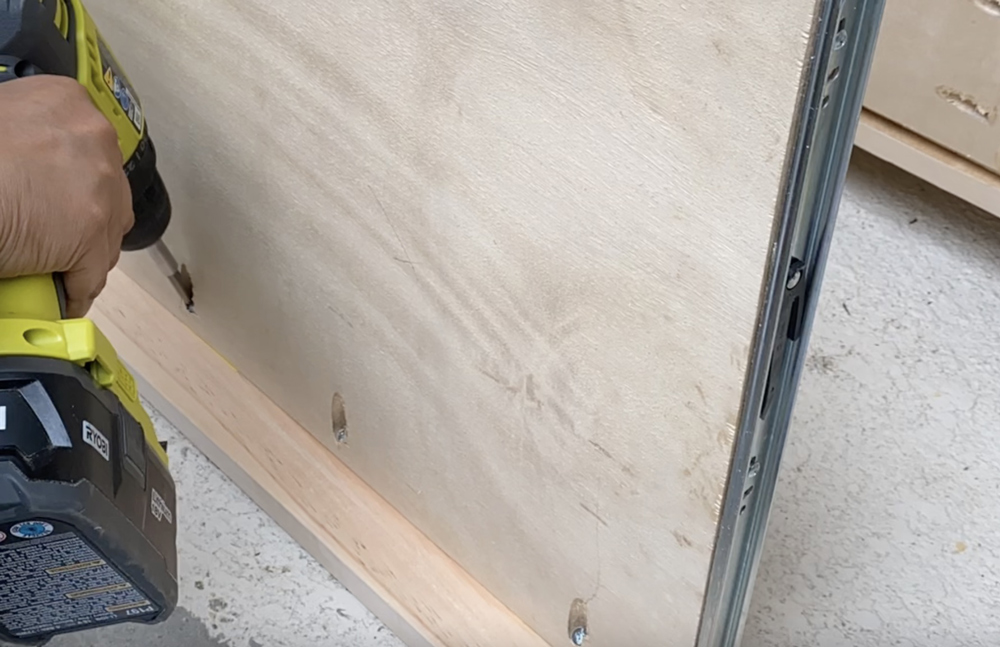
Add the same decorative trim around the edges of the sides of the base using wood glue and brad nails.
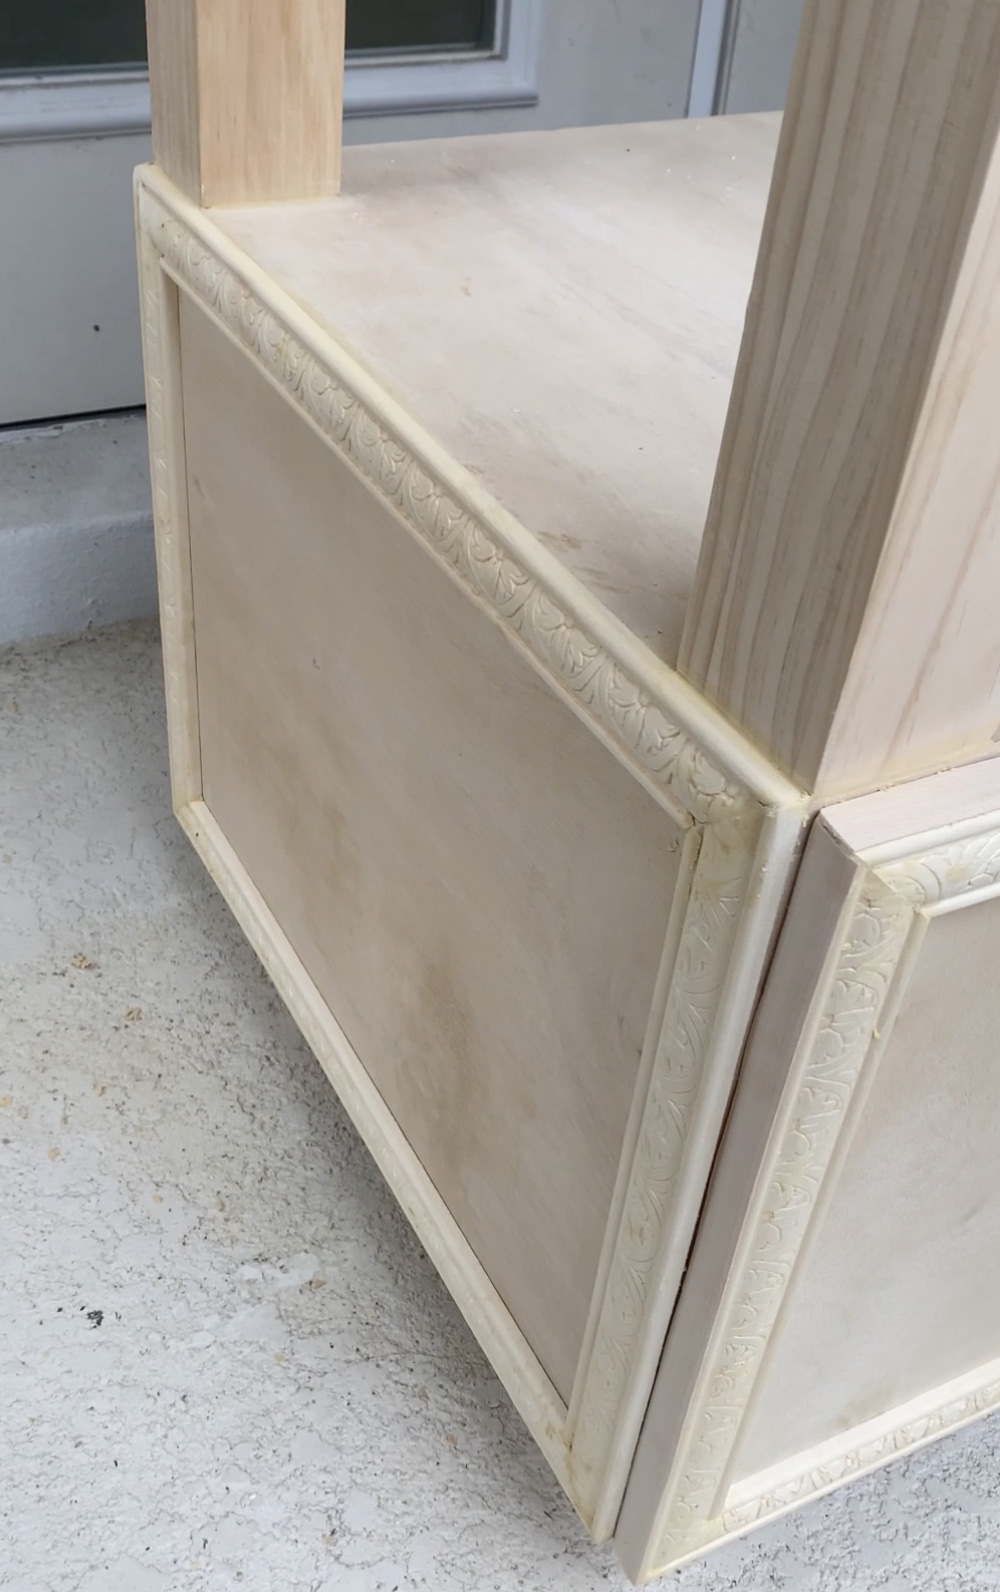
The storage for our Pooja Mandir is complete and we can now move on to the gopuram.
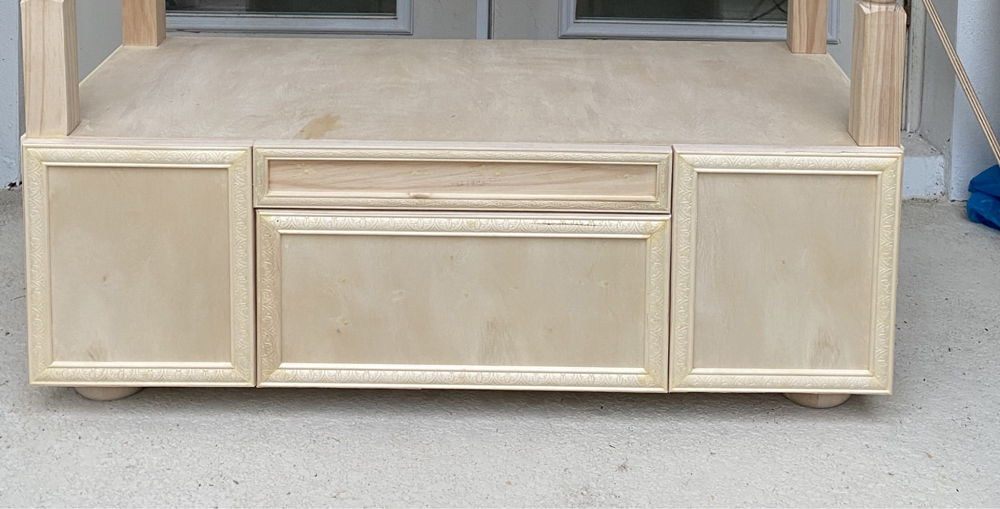
The Top
The top portion of the gopuram part of the Pooja Mandir is the most exciting and challenging part of this build. As this takes shape, I promise you will get happier and start to feel that sense of accomplishment I mentioned earlier.
We will use decorative moulding to build the gopuram which is similar to a pyramid structure.
First, let’s add some decorative moulding around the edges of the gopuram base.
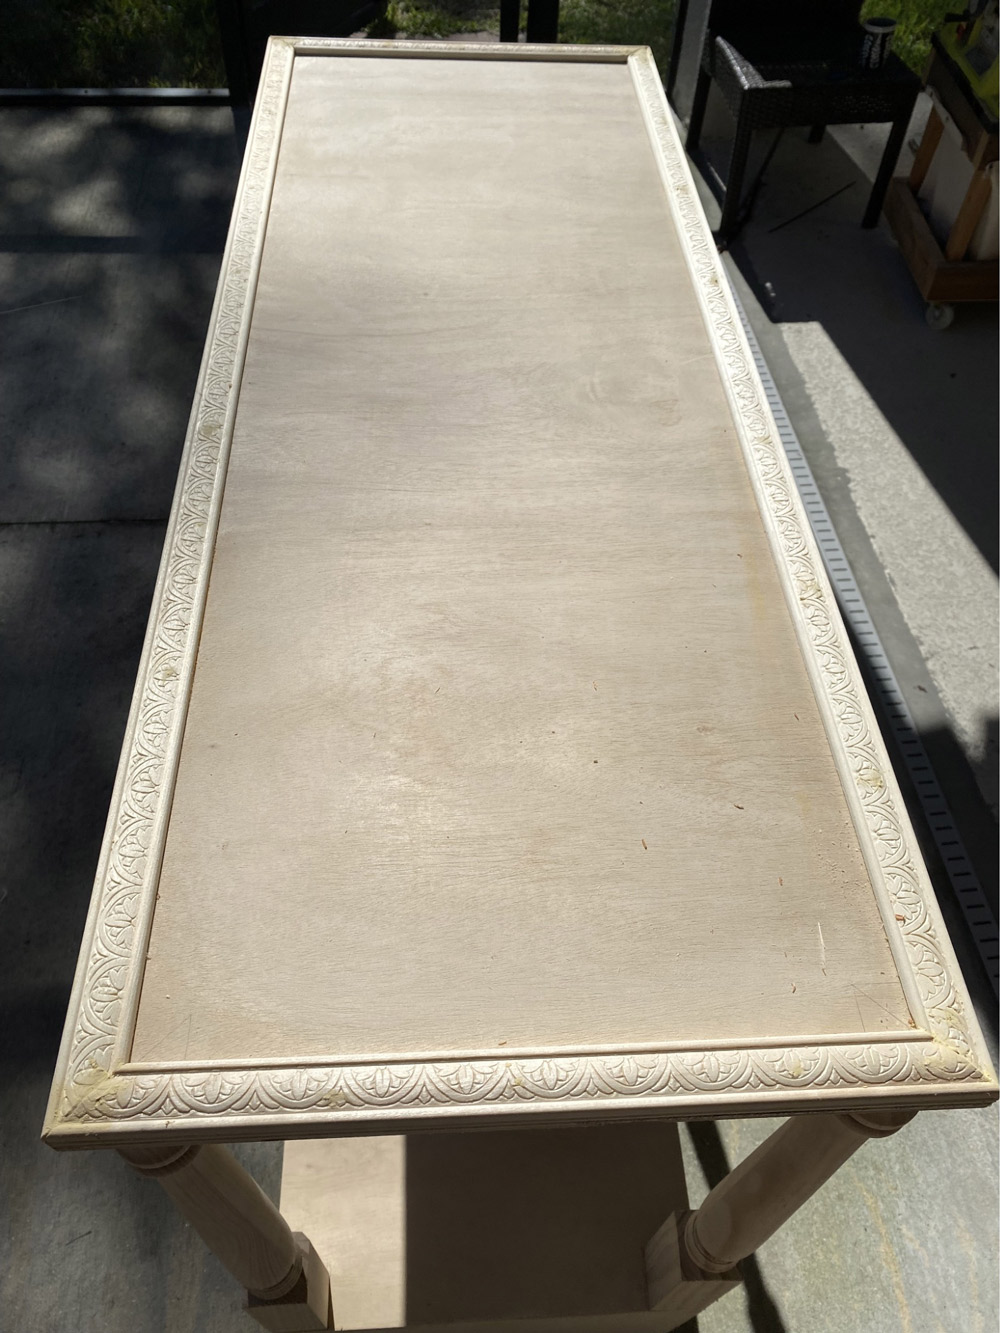
Next, measure the length and width of the gopuram. For this portion, let’s use egg and dart moulding as it gives such a beautiful look to the gopuram.
We need to cut the pieces very similar to the way crown moulding is cut using a miter saw. Turn the miter saw blade to 45 degrees. Line up the base of the moulding (the egg side) against the base of the saw and the top of the moulding against the fence of the saw, and make a 45-degree cut.
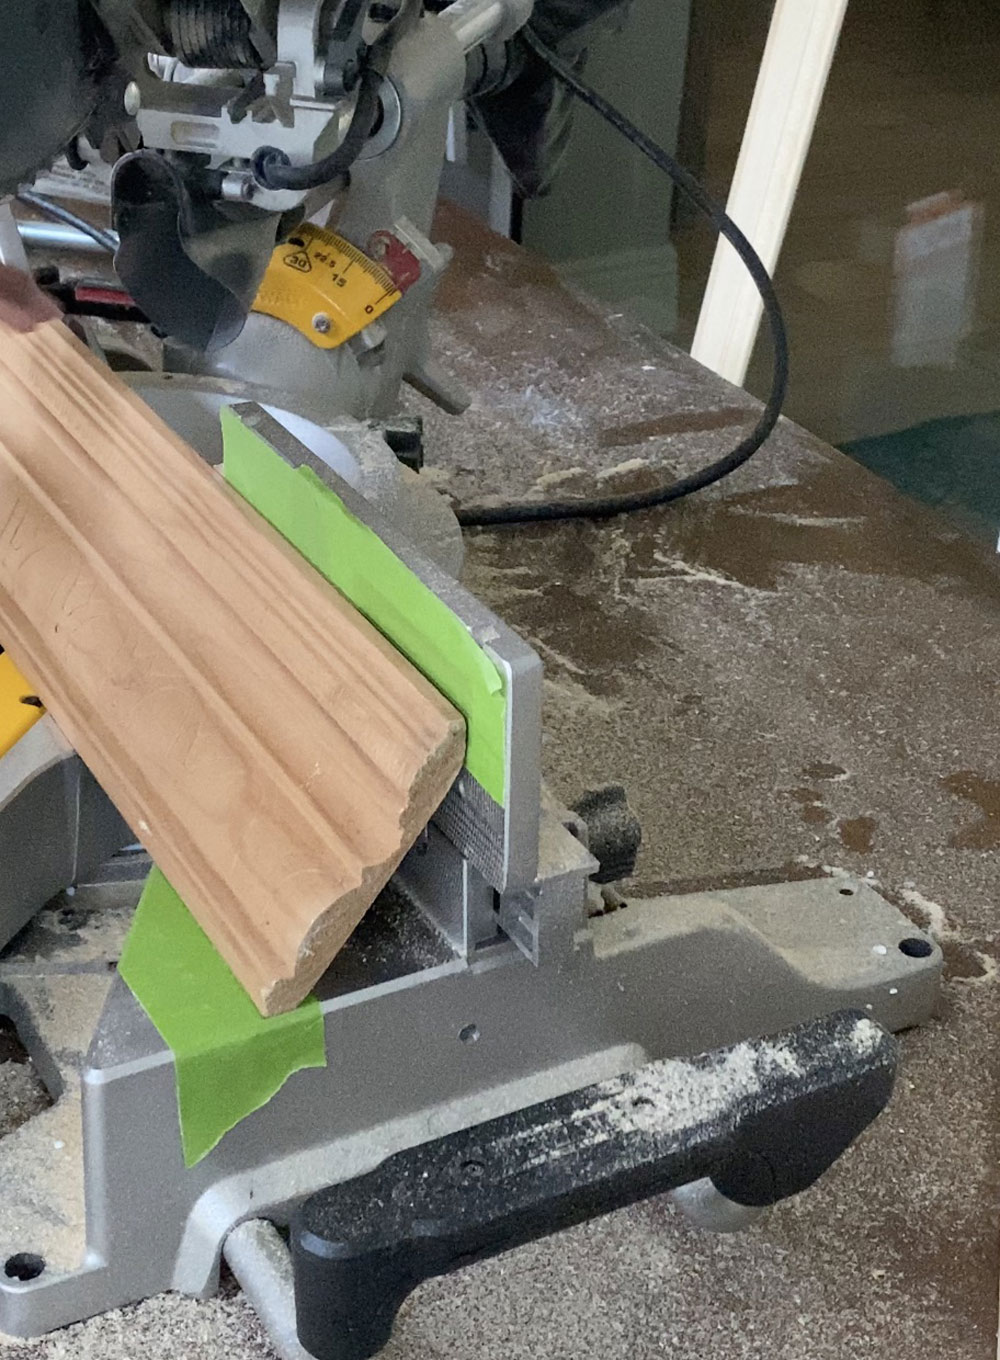
Then turn the blade to 45 degrees on the opposite side. Measure and mark the moulding for the desired length. Line up the moulding as explained earlier and cut on the other side.
Our first piece is ready. Let’s cut the remaining three pieces similarly. Attach the four pieces just like a pyramid using wood glue and brad nails.
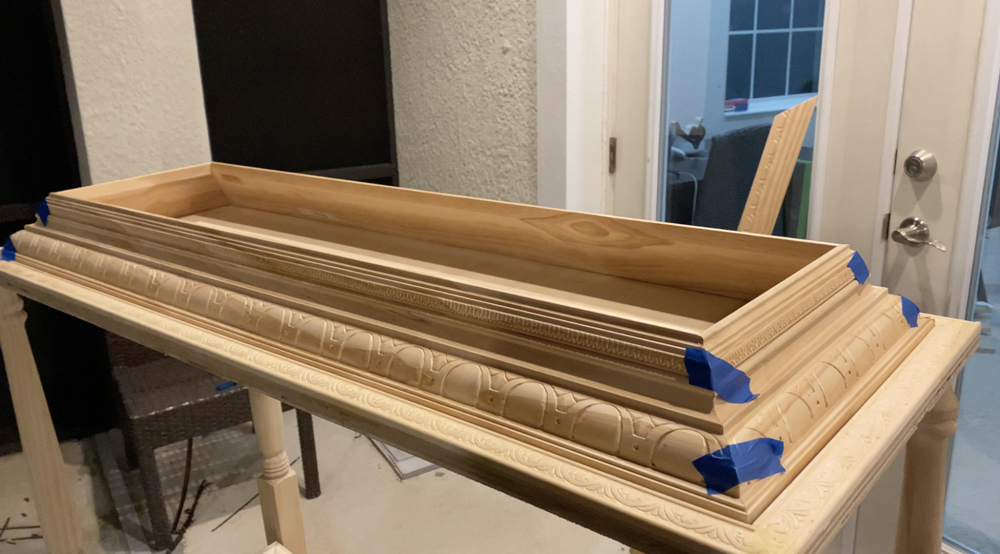
Then attach the pyramid to the gopuram base using wood glue and brad nails.
The first level of the gopuram is ready, and we will add another level to it. Before we do that, we need to add supports for the second level to sit on.
Let’s cut a few pieces of ¾” plywood where their height is about ¼” less than the height of the first level of the pyramid. Add pocket holes to these pieces and attach them to the base of the gopuram using wood glue and pocket screws.
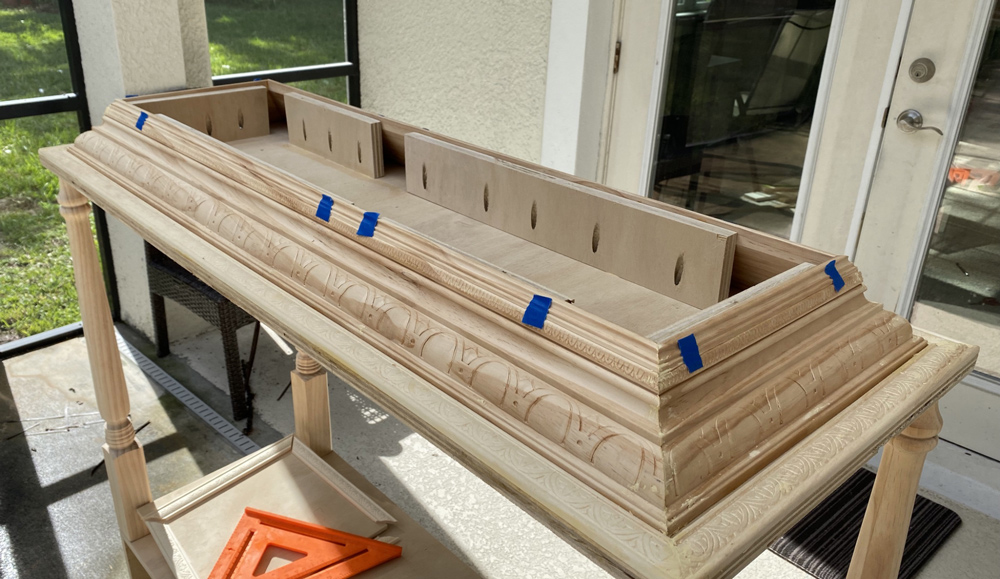
Now, we can measure and build the second level just like we did for the first level.
Once the second level is built, measure the opening at the top of the pyramid and cut ¾” plywood to fit that opening. Attach using wood glue and bard nails.
Now the second level is ready, but we have one more step before attaching it.
Gopurams usually have decorative tips at the top and we can use a few decorative bun feet or finials for this. This design calls for five tips. Line them up on top of the second-level pyramid so that they are equidistant.
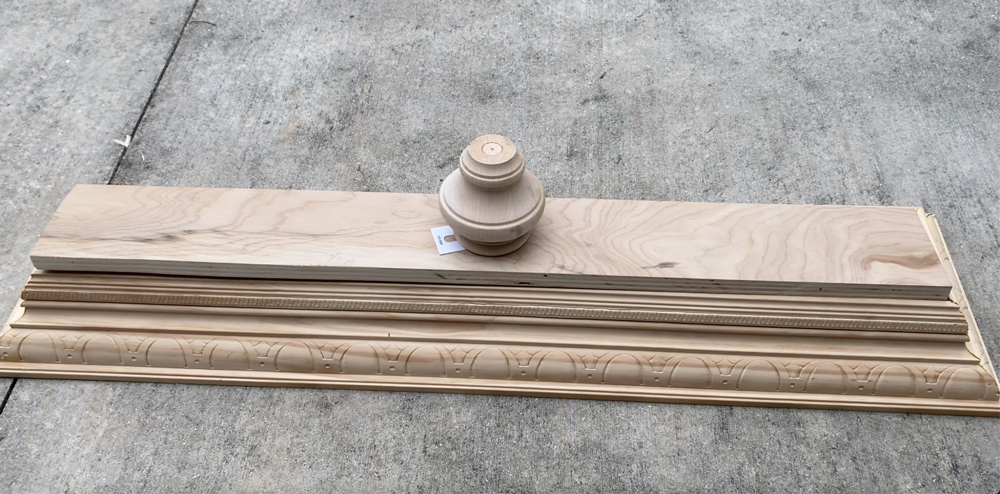
Mark the spots and drill pilot holes. Similar to how we had added the support legs, we will use wood glue and screws to attach the tip to the pyramid.
We can now attach the second layer pyramid to the support structure we had added earlier using wood glue and brad nails.
Next, add decorative molding to the front and sides of the gopuram base.
Use a miter saw to cut the moulding at a 45-degree angle for clean seams at the corners. Attach the moulding using wood glue and brad nails.
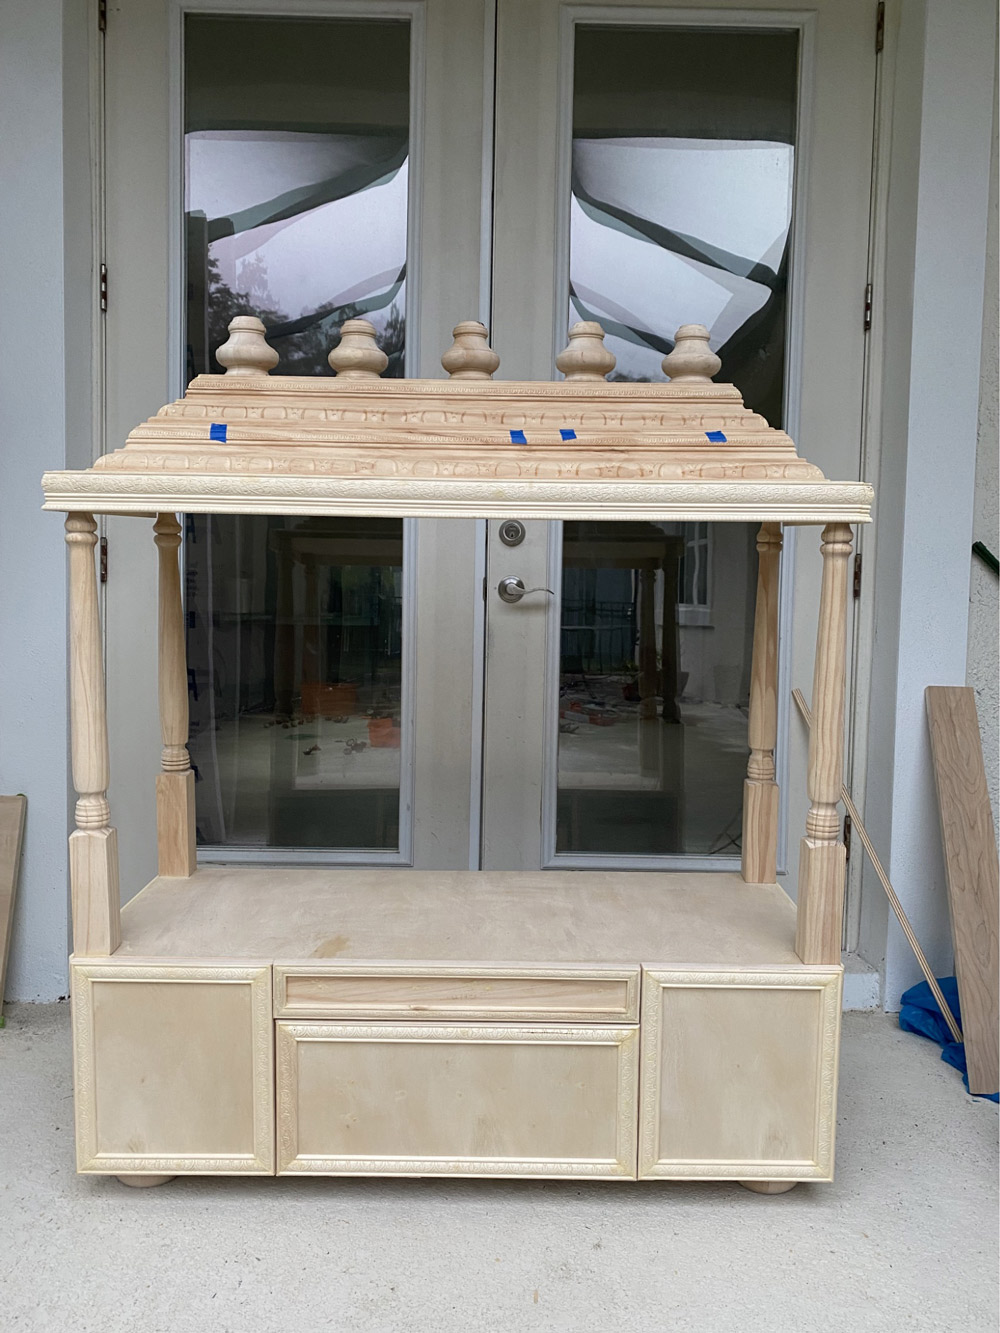
There is just one more thing to be done before we can call the build complete.
Measure the back of the pooja mandir from the bottom of the base to the base of the Pooja Mandir. Using this measurement, cut out a piece that will form the back of the Pooja Mandir using ½” plywood. Attach this to the back using wood glue and screws.
This completes the build, and all that is left now is the finishing.
Finishing
Here are the steps to finish the Pooja Mandir:
- Ensure that all the nail holes are filled with wood filler and sanded down once the filler has dried.
- Sand the entire Pooja Mandir with a 220 grit or higher sandpaper.
- Wipe with a damp rag to remove the sanding dust.
- Apply 2 coats of your choice of stain, sanding in between coats. The stain used for this Pooja Mandir is Varathane Early American.
- Apply 2 coats of polyurethane with sanding in between coats.
- Add knobs to the storage drawer, pull-out tray and doors.
- Add wood appliqué on the drawer front, doors, and sides of the Pooja Mandir. (Stain the appliqués and attach them to the Pooja Mandir with wood glue and brad nails.)
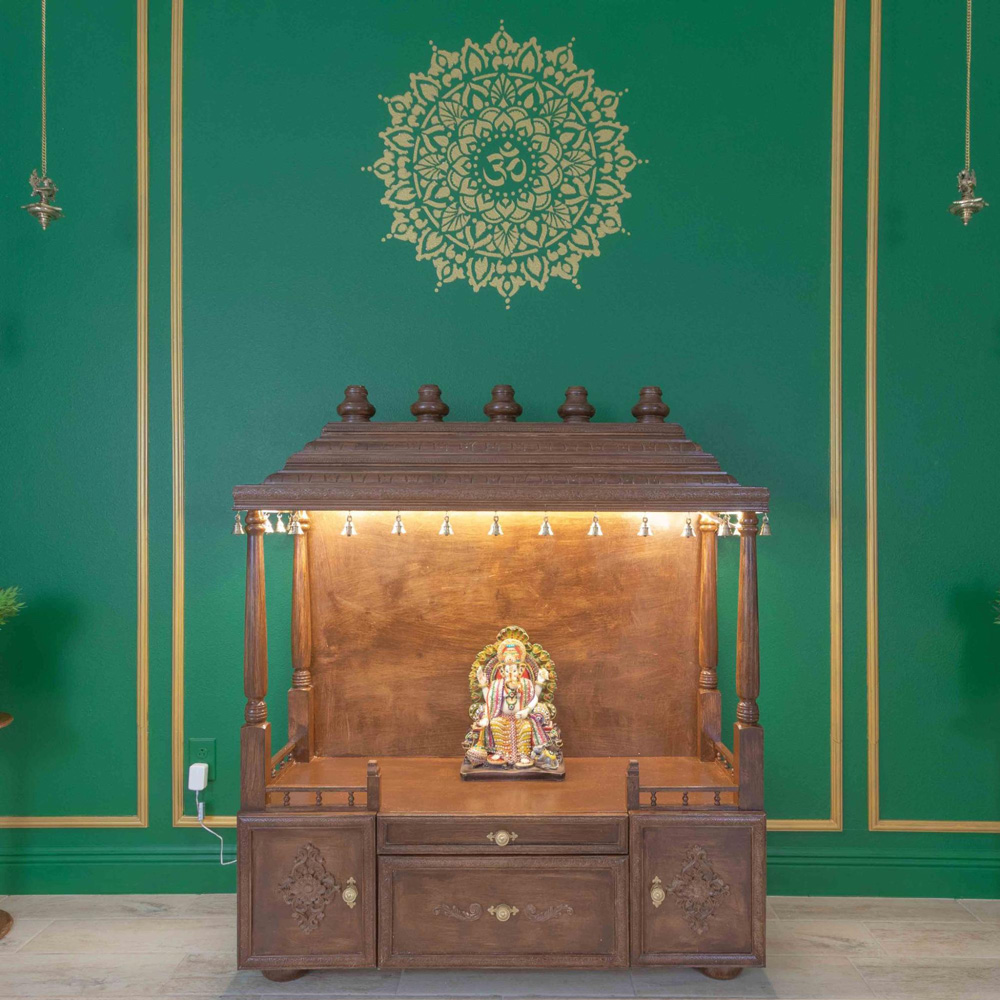
- Drill tiny pilot holes all around the base of the gopuram and add eye hooks to hang tiny bells.
- Add other embellishments such as LED lighting. LED light strips usually come with an adhesive on the back of the strip. Just cut the strip to size and stick it on the underside of the gopuram. Drill a tiny hole through the back of the Pooja MandirPooja Mandir for LED wiring or a battery pack.
The Pooja Mandir is finally complete and ready to be used! Here is what it looks like:
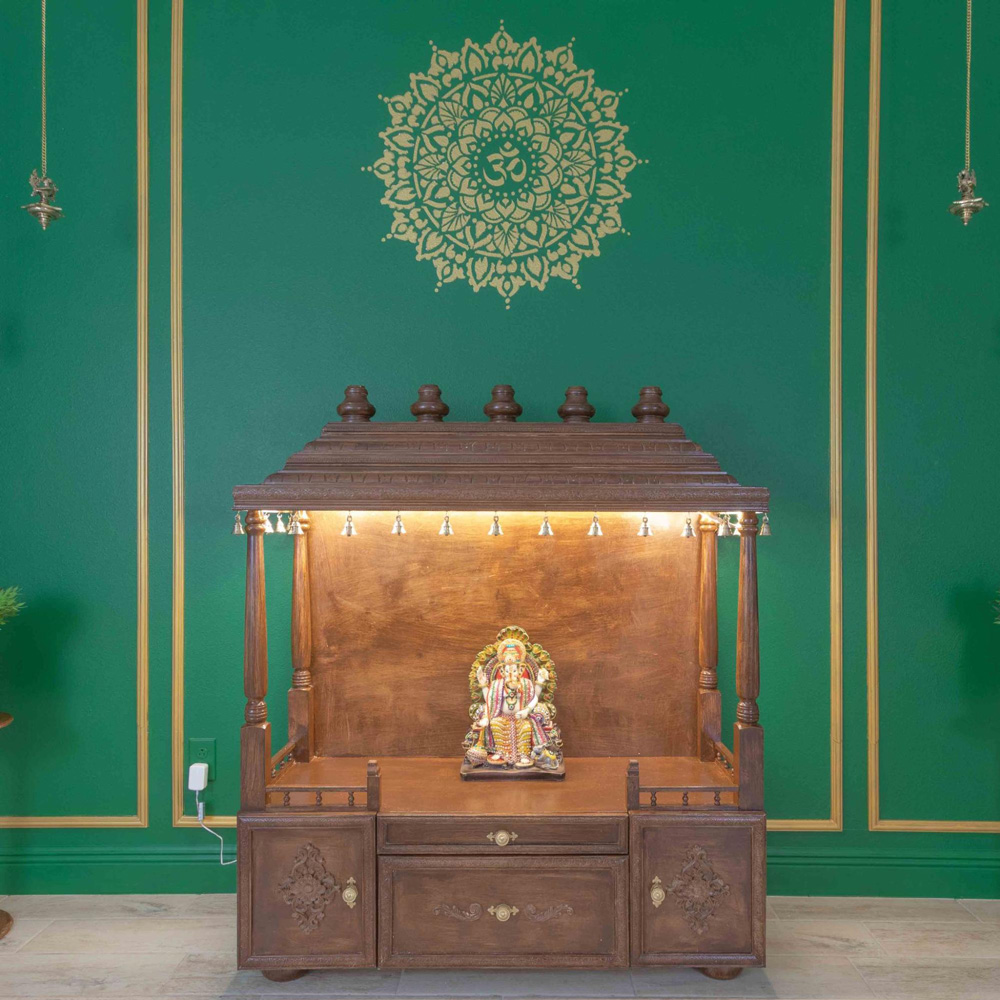
Knowing how to build your own Pooja Mandir is quite satisfying. It adds another level of happiness and serenity to your prayers.
Shop at Home Depot for everything needed to create your prayer sanctuary.
This post was created in partnership with The Home Depot. The author may have received compensation for this article and associated images or video, potentially in the form of products and/or services. All expressed opinions and experiences are the author’s own words.


