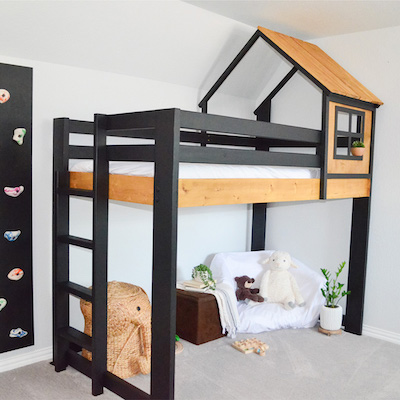
How to Build an Indoor Kids Rock Climbing Wall

Last updated August 21, 2024

*Camille is the creator of The Kurtz Home. She is a working mom of two girls and spends all her free time turning her builder-grade house into a custom home. She's a designer turned avid DIYer, with a career background in retail design and a B.A. from San Diego State University with an emphasis in Interior Architecture. Camille is passionate about making bold statements with architectural elements and color to add personality and character to every space.*
A Note From The Home Depot
A playroom can be way more fun than a room just filled with toys. In this blog, DIY expert Camille Kurtz made a rock climbing wall for her kids to enjoy. Don’t worry, it’s safe for adults to get in on the fun too! Read below to see how she did it with the help of The Home Depot.
Table of Contents
How to Build an Indoor Kids Rock Climbing Wall
How to Build an Indoor Kids Rock Climbing Wall

Skill Level: Beg-Med
Time to Complete: 2-3 days or about 10 hours
Hi Friends - Let’s build a kids’ rock climbing wall. Below is a step-by-step guide of how to create this fun DIY for your kids.
Step 1: You’ll need to select the wall you will build on. Then, determine if you can go directly into the studs or if you need to add supports. Luckily, I was able to attach directly to the studs. The beauty of these climbing holds is that they don’t need space on the backside for the bolts. If you need to add support, I recommend screwing 1’x6’x8’ pine boards horizontally directly to the studs. Then, when you get to the part of applying the climbing boards, you can attach at a point along the pine board.

Step 2: Layout your boards based on the wall space. I decided to use 2’x4’x ¾” plywood for easy handling. I did have to trim my boards to accommodate the overall size of 6’x8’ and to account for an outlet. Never cover an outlet. Always leave it exposed. If you are worried about little fingers in the outlet, then use outlet plugs.

Step 3: Lay out all of your climbing holds. You’ll want to measure your kids’ reach to make sure they can grab each one. My kids are three and five so the holds are about 12-15” apart.

Step 4: Take the pegboard and align your climbing holds. The spacing for the holes and the pegboard are the same. The pegboard helps you space the holds and align the climbing holes. Now mark each hole.

Step 5: Now that you have your climbing holds placed and marked, you can use the pegboard as a template. Keep close attention to how the holds align from board to board, and mark each board.

Step 6: Place your board on two pieces of scrap wood so it’s elevated from the ground, or place it on a table because you’re going to be drilling those holes. Pro tip for success: Go slow and make sure to be perpendicular with the wood. This will help later when you add the bolts.

Step 7: Sand the board with the 150 grit. The orbital sander makes quick work of this step. You will also want to go along the edges to soften the corners.

Step 8: Use your shop vac to clean up all the debris. I like to vac as I go.
Step 9: Flip the board over and hammer in the provided bolts from the climbing holds package. Side note - if you want to add more holes than the climbing holds provided, you will need to buy additional bolts.

Step 10: Repeat steps six through nine until all boards are completed.

Step 11: Let’s paint, or in my case, stain. I decided to stain my boards with white wash to reduce the natural yellowing of plywood, and it turned out to be a beautiful finish that added some warmth to the playroom.

Here’s a side by side of the natural plywood to the white wash finish.

Stain in sections with a foam roller and wipe the excess stain off as you go. The longer the stain is on the board, the whiter it will be. Here’s what the board looks like in the three phases.
Top: Natural; Middle: White washed; Bottom: White wash wiped off.

Don’t forget those sides as well!

Step 12: Once your stain or paint is dry, apply a clear coat. YES, this is a necessary step to protect the wood and to create a smooth surface for the kids. Mine like to draw on everything so this clear coat will protect the wood from them too…lol!!
I added tape over the holes so the clear coat didn’t drip in, but I would say this isn’t necessary. You can add the clear coat right on the board, just be mindful of excess dripping.

Step 13: Let’s get these boards up on the wall. While the clear coat is drying, mark all the studs on the wall with a stud finder. I marked the studs first then drew lines up the entire wall, with my level, as guides.

Step 14: Apply your first board in the bottom corner. This is the most important board so make sure to level as you go. This will be your anchor for the rest of the boards. Mark your holes and drill pilot holes to reduce splintering the wood. I applied nine screws per board and went directly into the studs.


Step 15: Apply the rest of the boards working your way up the wall. Add shims as you go to make sure the boards stay flush with one another.

Here’s what the boards like in the end. Again, using the smaller 2x4 boards allowed me to easily install this project on my own. If you decide to use larger pieces, I highly recommend you have 2 people. These boards can get heavy.
Step 16: Lastly, apply the holds per the instructions. The climbing holds kit provides 3 sizes of screws, so make sure to select the correct length screws. I used the smallest size.

Now sit back and watch your little ones enjoy non-stop climbing! Side note - these holds can support a grown adult. Trust me, the kids aren’t the only ones that like to climb.
I hope you try this project. If you are looking for more fun DIY projects to turn your house into a custom home come visit me at The Kurtz Home. Or join me on my Instagram, @the_kurtz_home for behind the scenes.
This post was created in partnership with The Home Depot. The author may have received compensation for this article and associated images or video, potentially in the form of products and/or services. All expressed opinions and experiences are the author’s own words.